Drywall can be patched, right?

It’s been almost four weeks since we moved in. I keep saying to myself, “I should do one last blog post once (insert task here) is finished.” Well, just as the task I was thinking of is almost finished, there is either a set back or another task pops up. I don’t know if this house will ever be finished. Yes, I know it will be someday. But the past few weeks have been frustrating. I’ll hit upon the major frustrations further down.

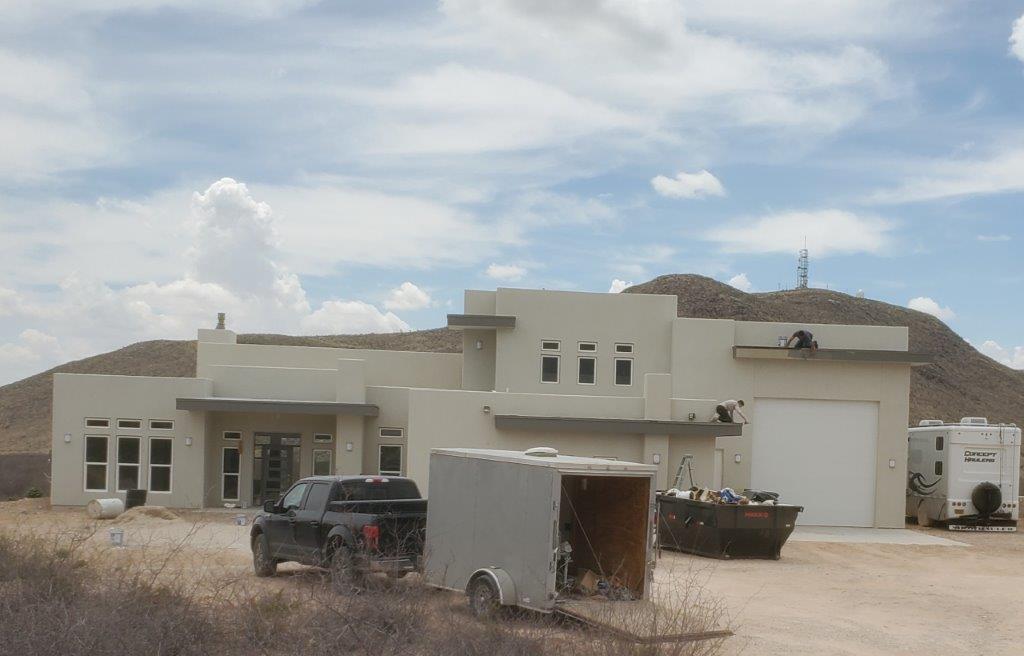
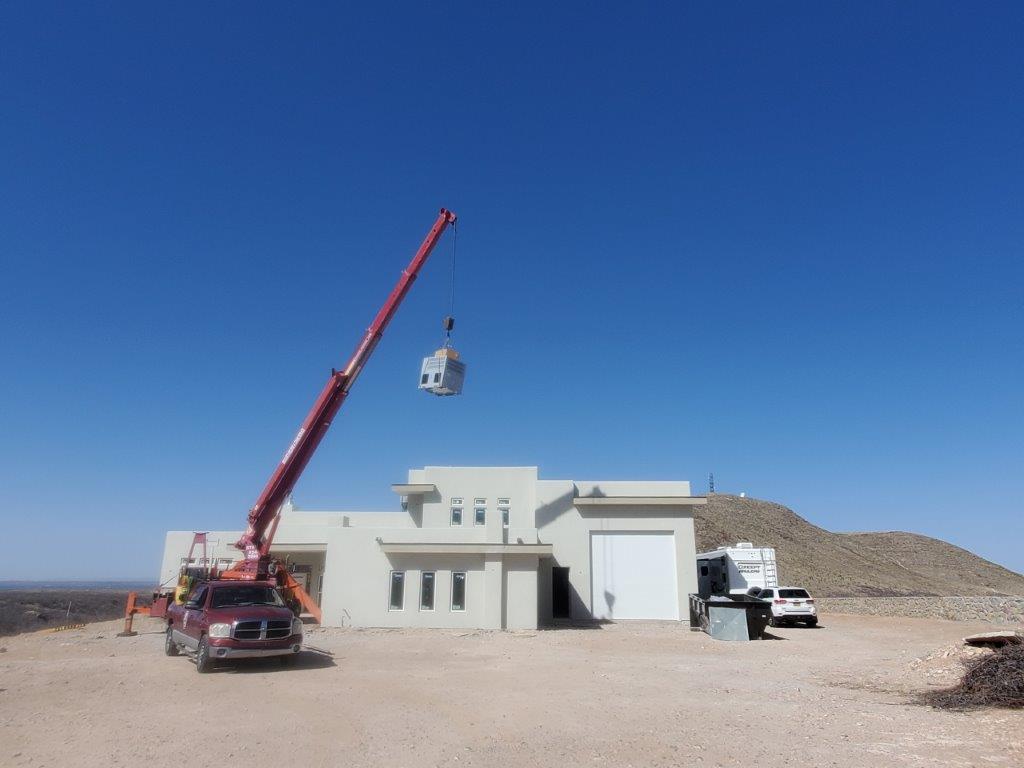
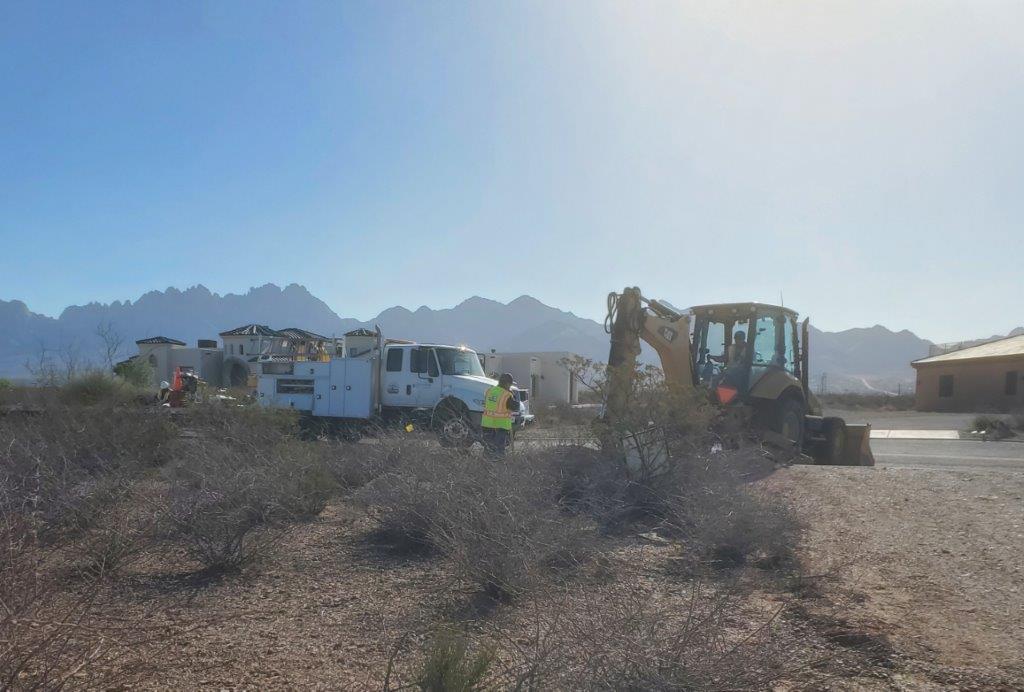
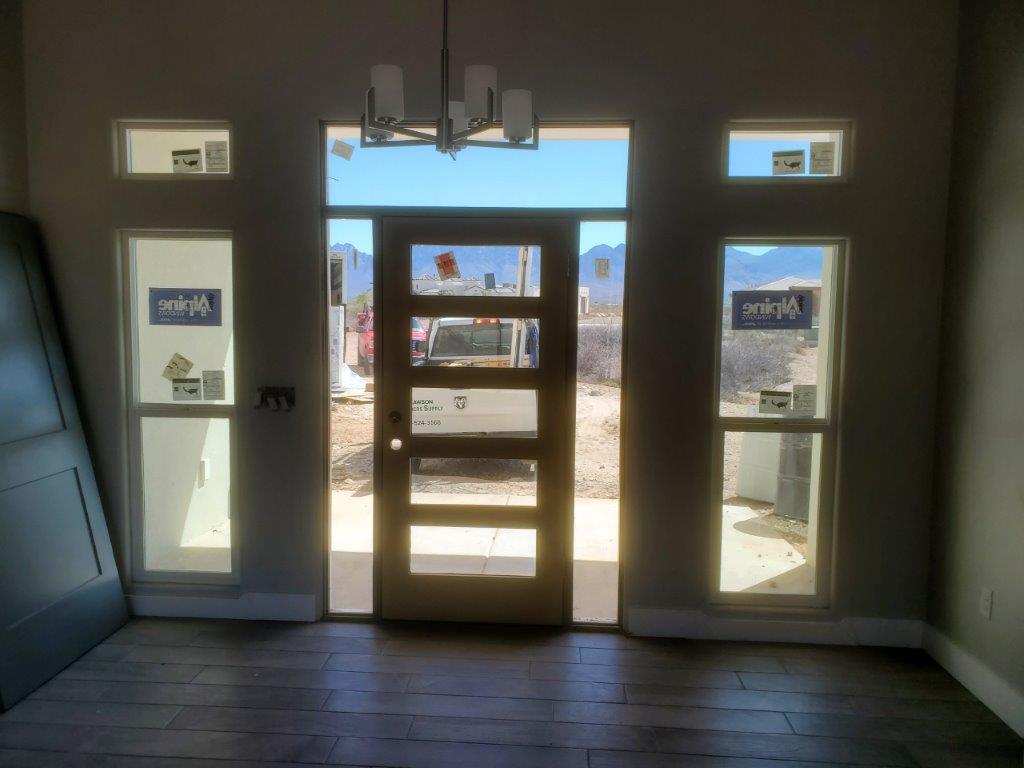
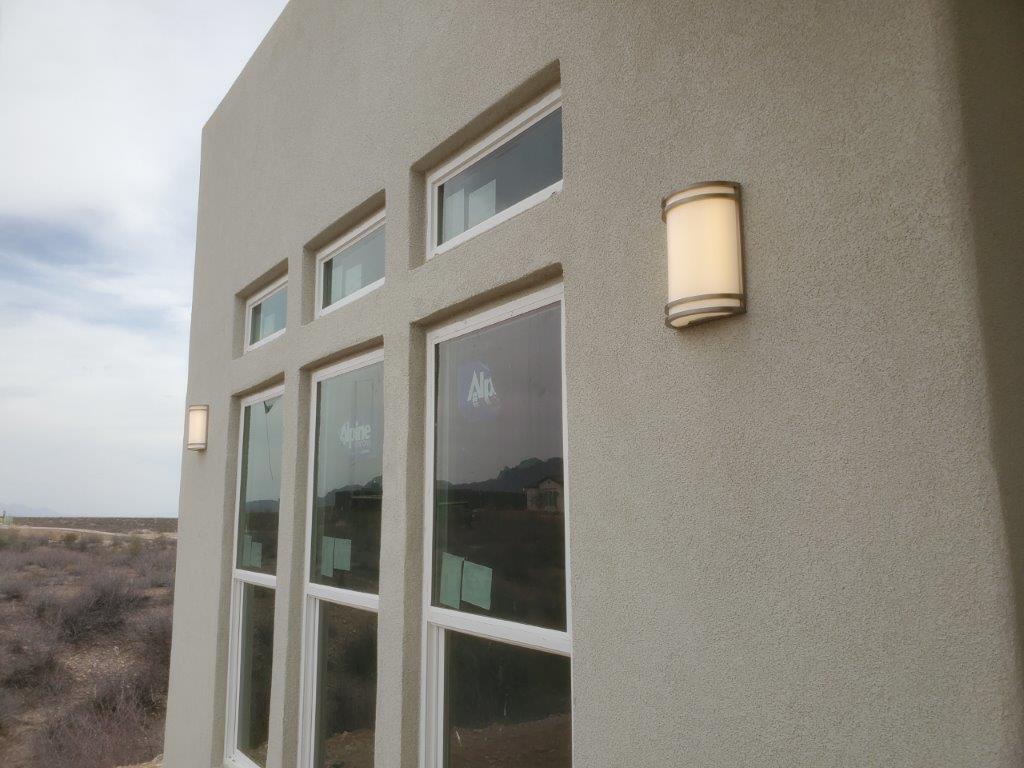
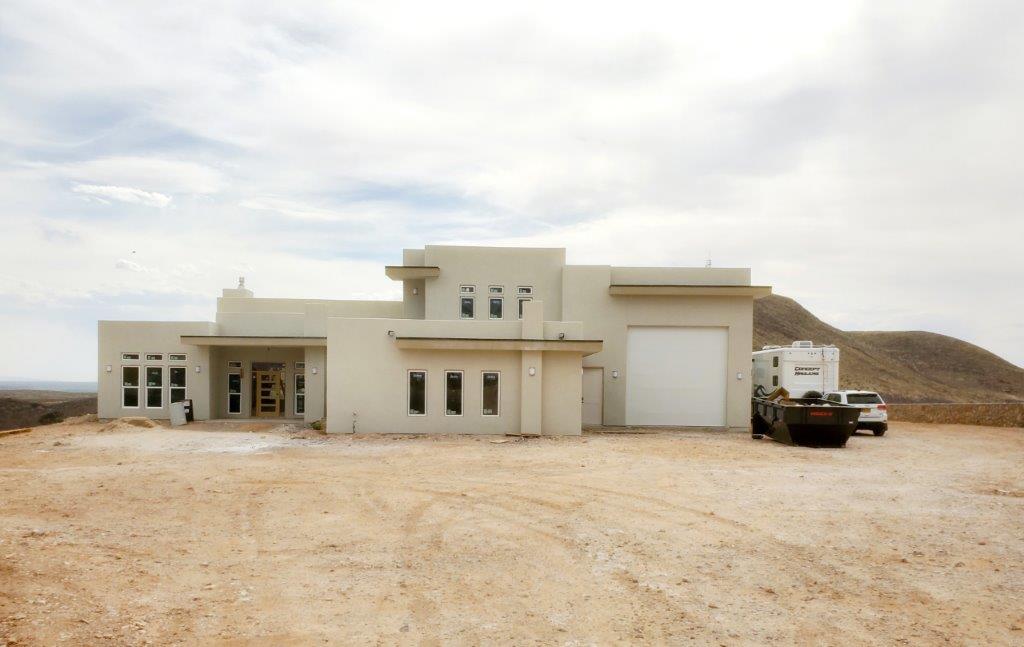
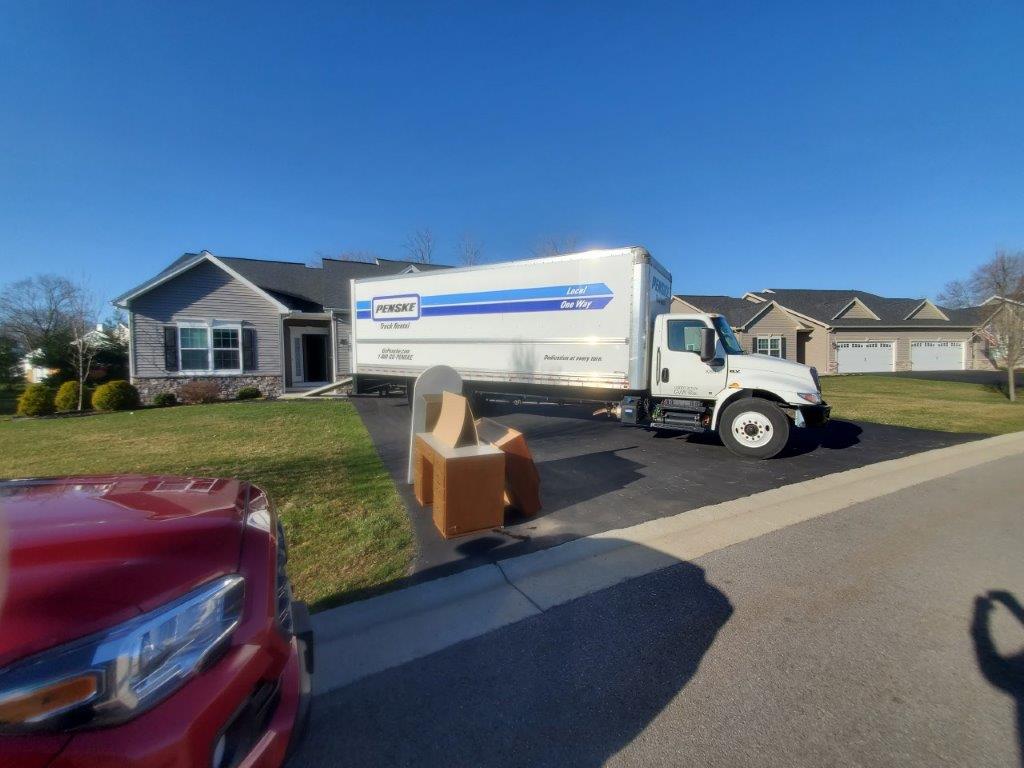
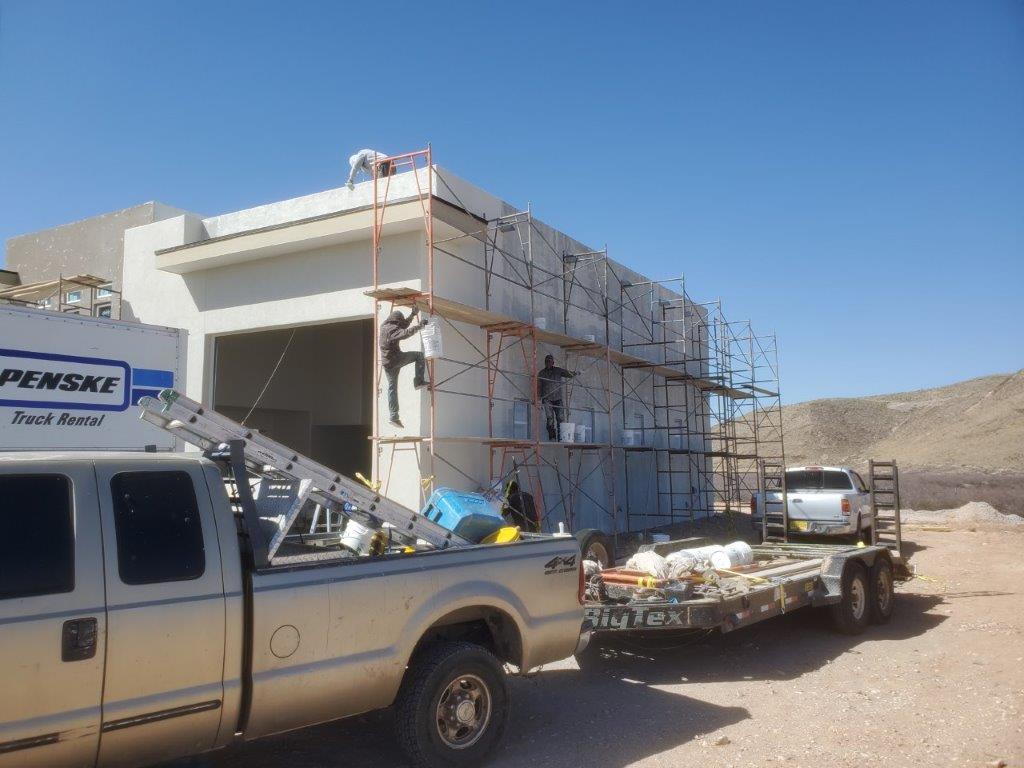
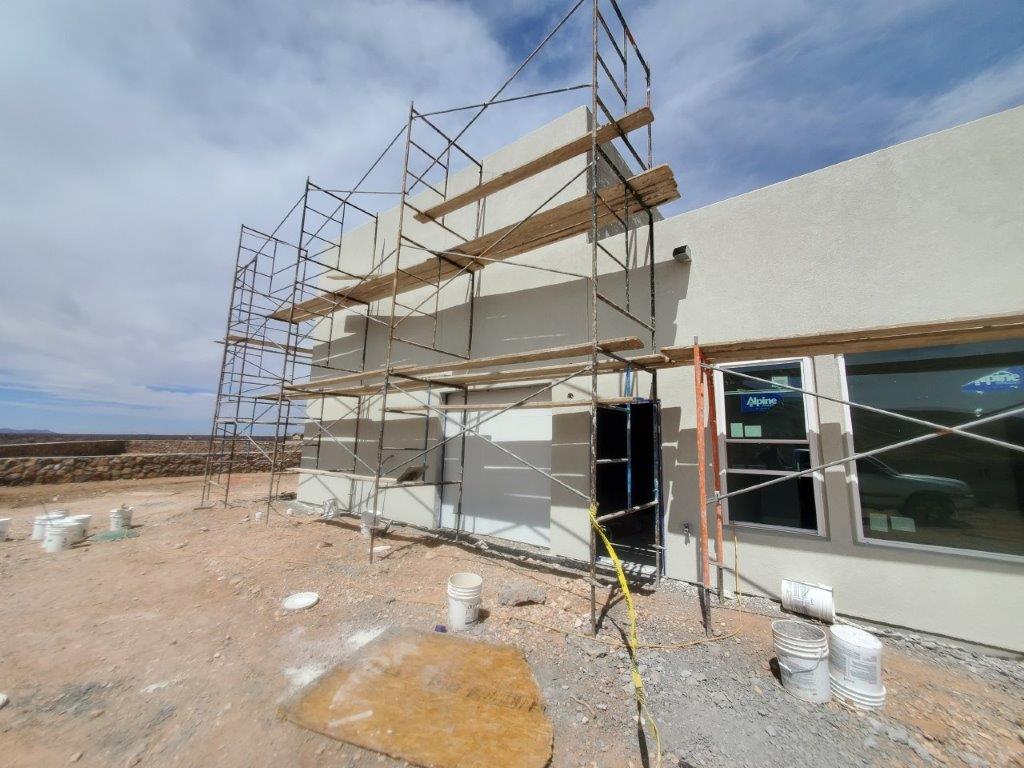
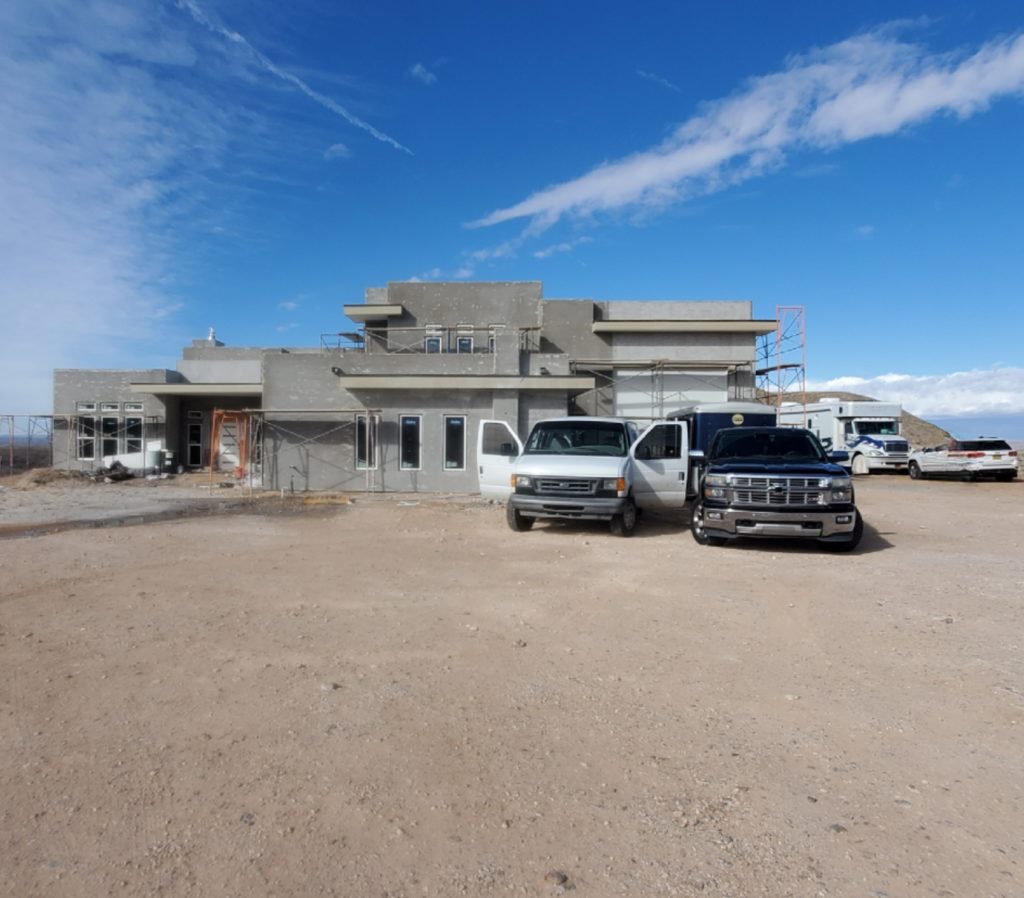
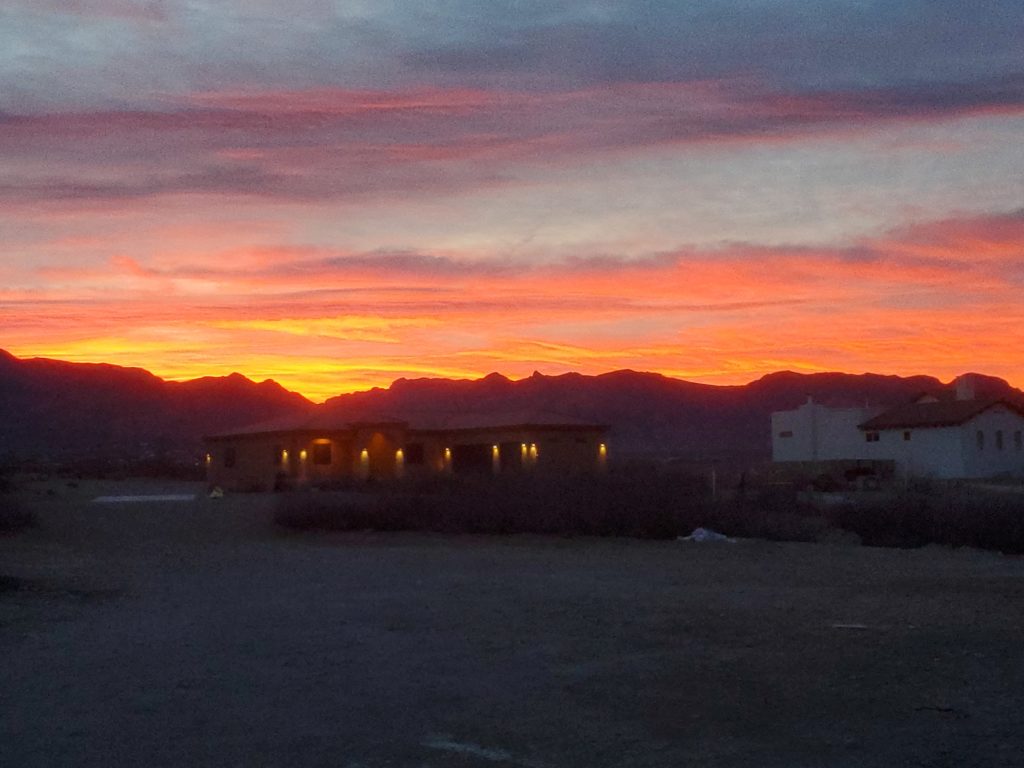
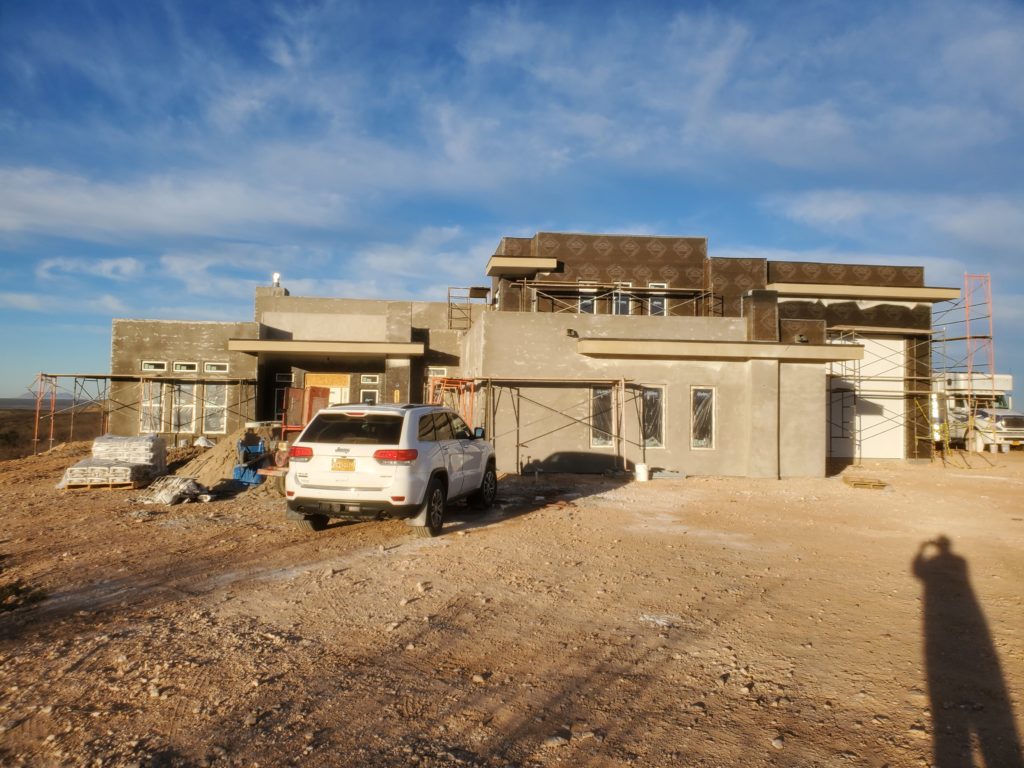
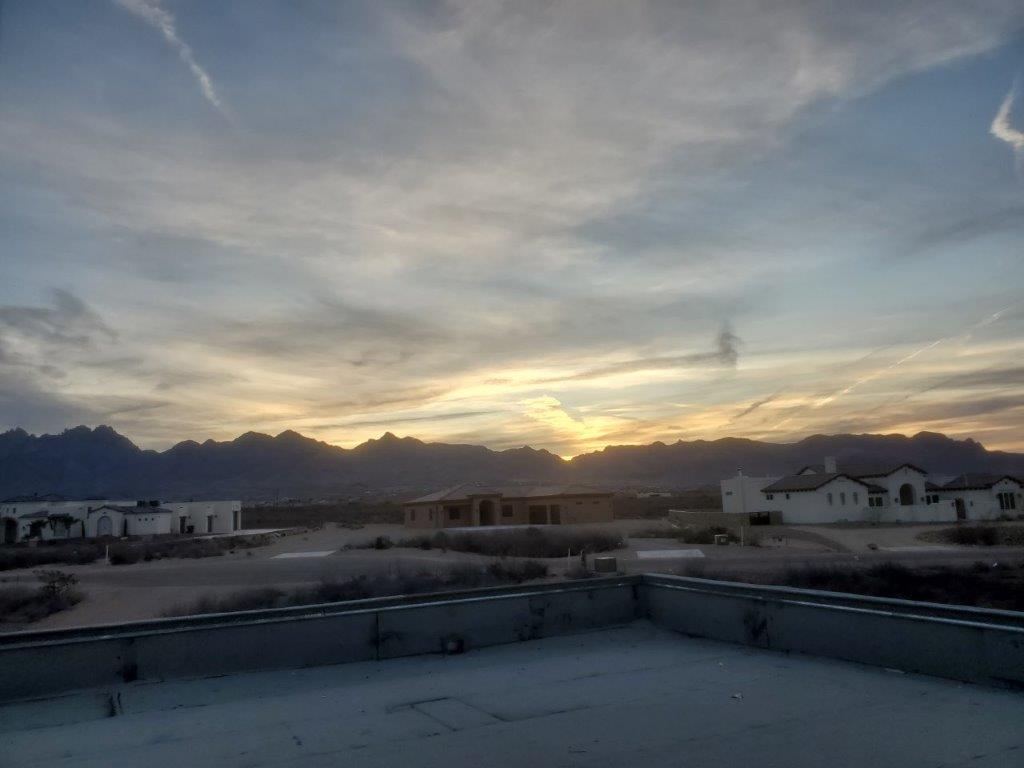
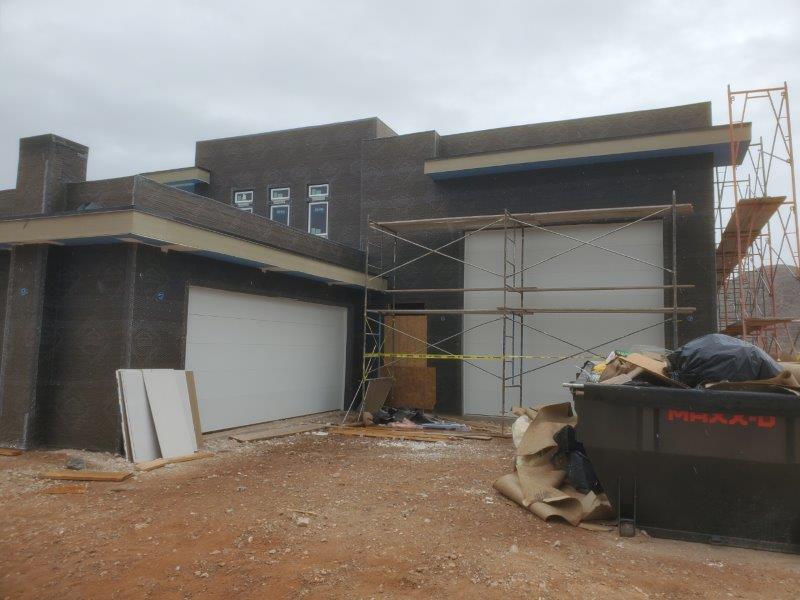
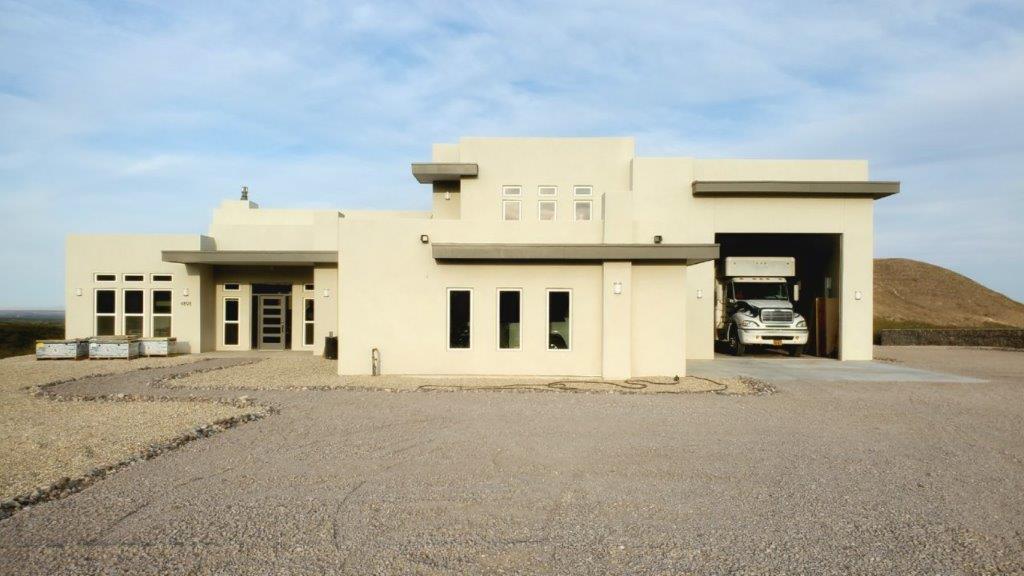
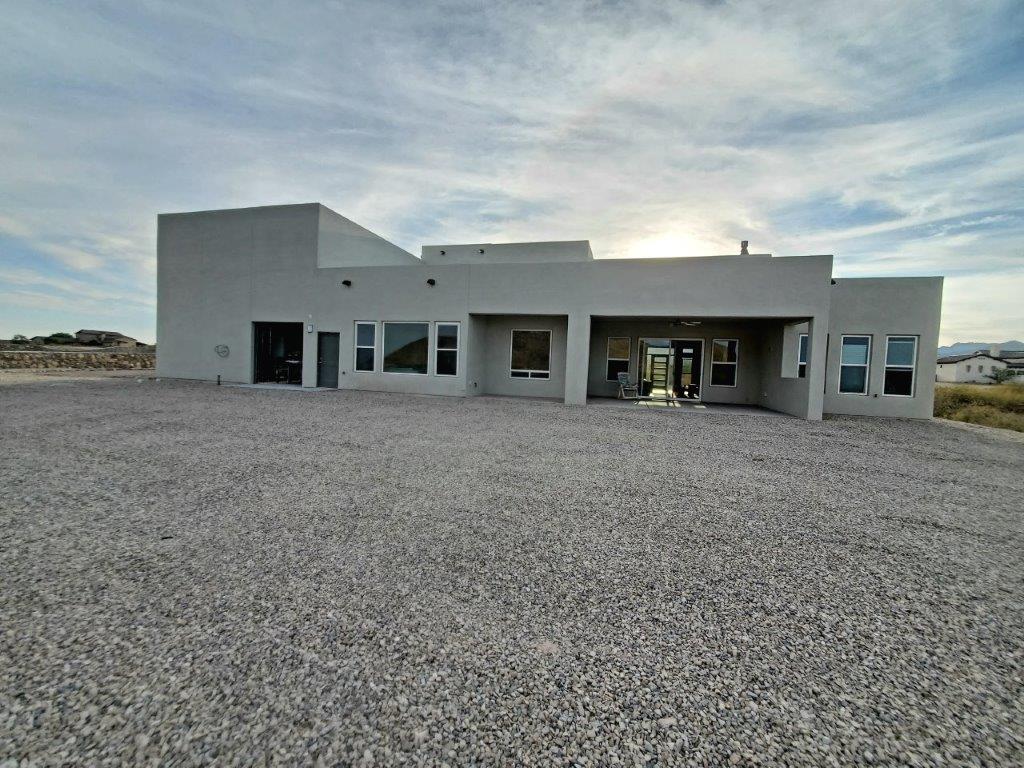
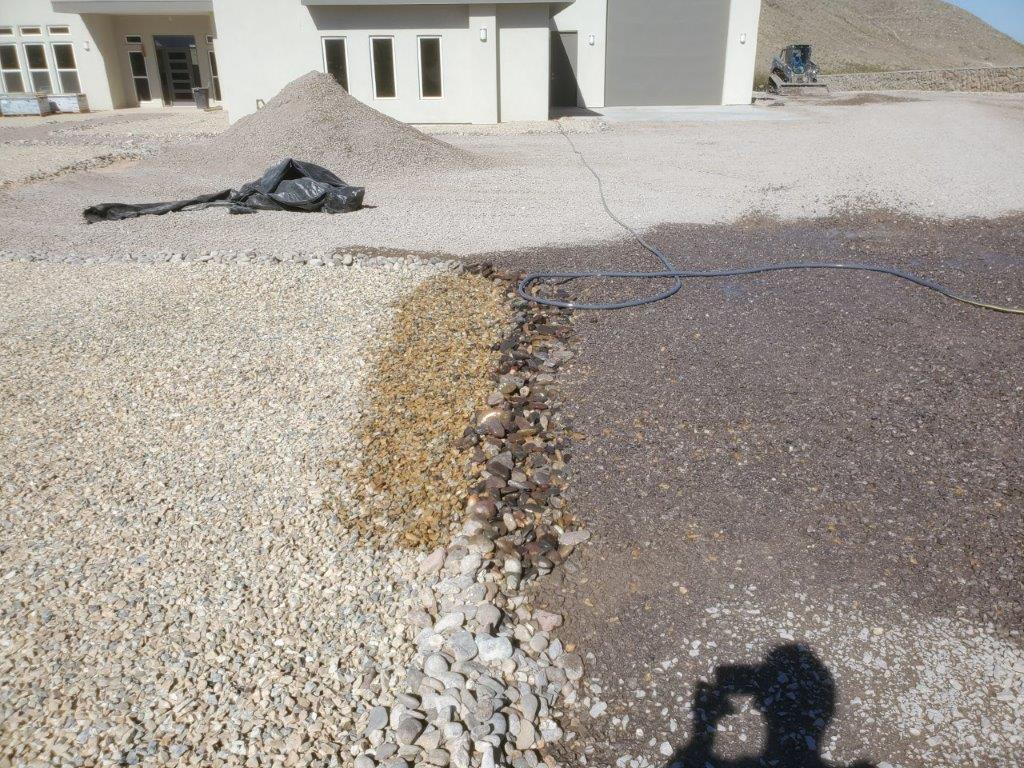
But first, this is how the outside of the house looks now. Landscaping down here consists mostly of rocks. Lots and lots of rocks.

Early morning sun shining on the house. We have a gravel driveway and sidewalk. Once the monsoon rains arrive in July/August, this driveway gravel will be very hard and compact.
Back of the house. You can see the sun shining through the front door and out the sliding door on the back porch. The rocks really keep the dust down.
This is what the rock looks like wet. Gray for the driveway, brown for the yard, and a river rock border.

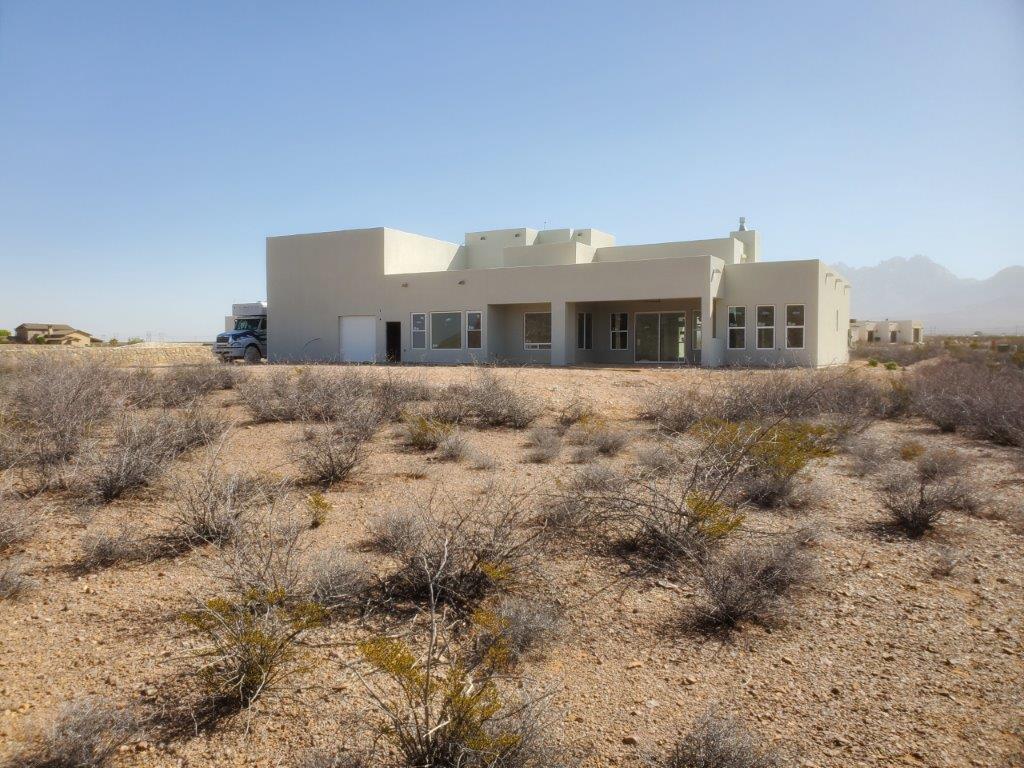
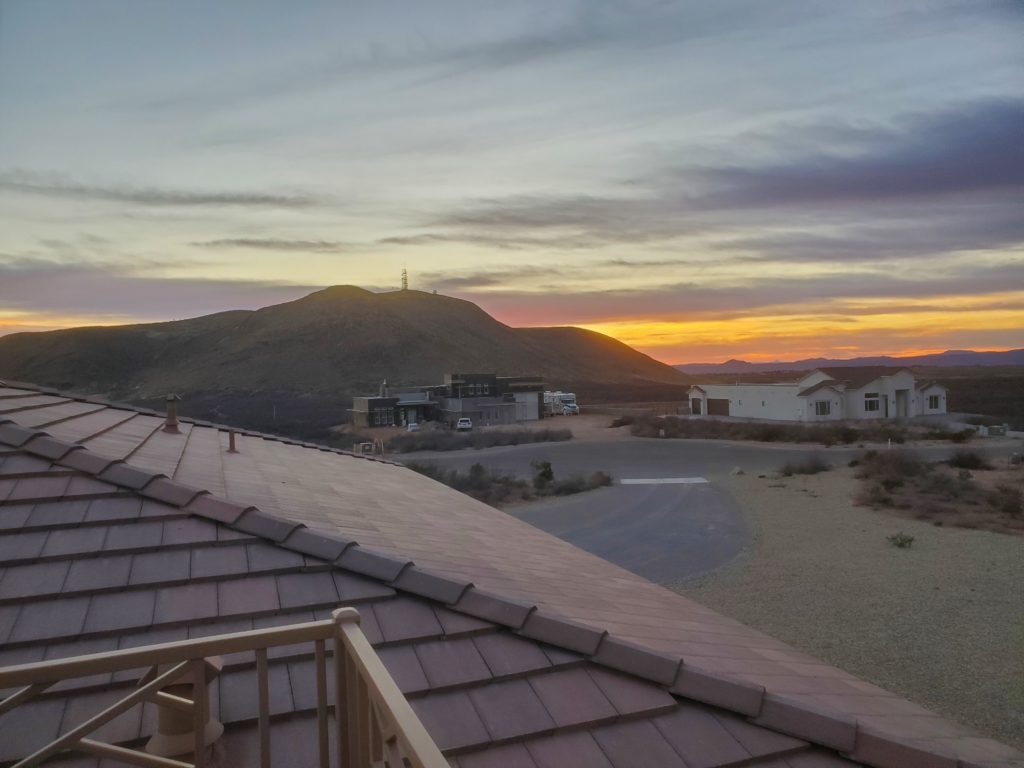
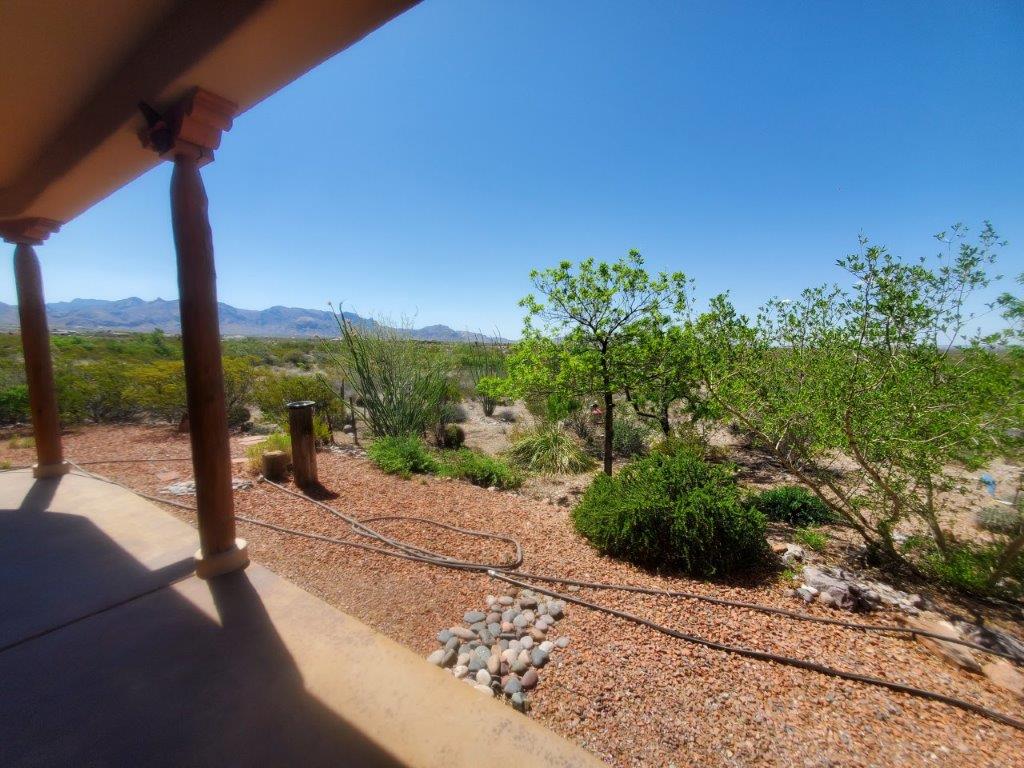
Landscaping will wait until the fall. We want to go with a xeriscape yard (no irrigation). It can be done. The picture below is the backyard of one of my quilting friends. None of this is irrigated.

These plants are all native and don’t receive any additional water other than what mother nature provides.

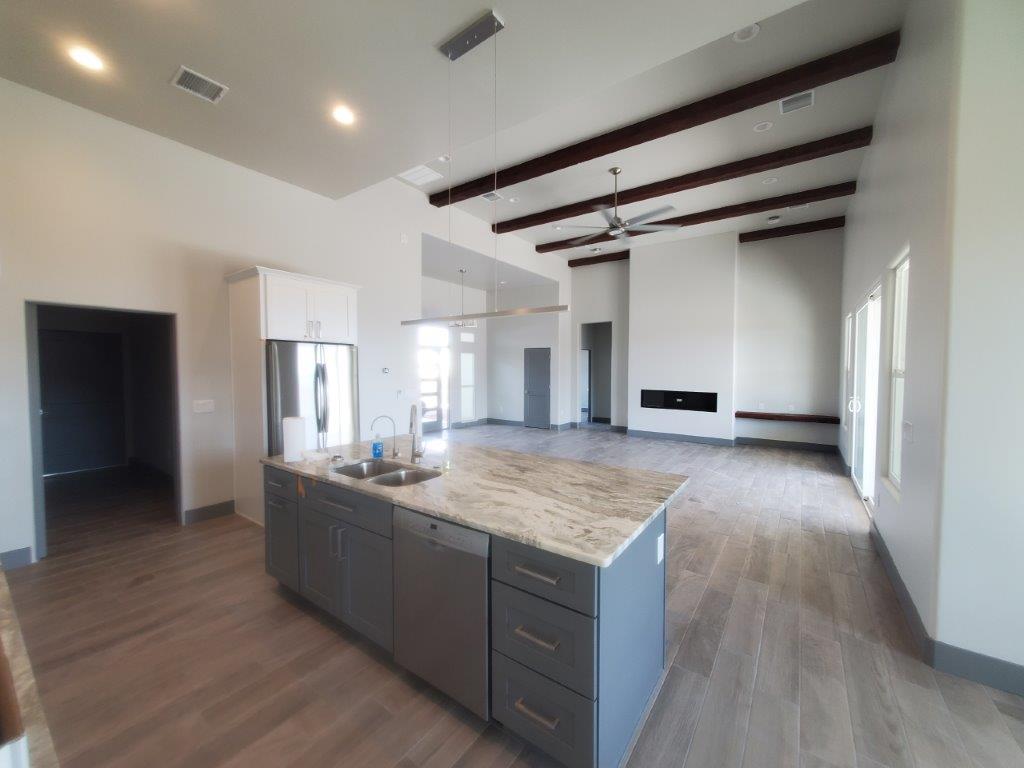
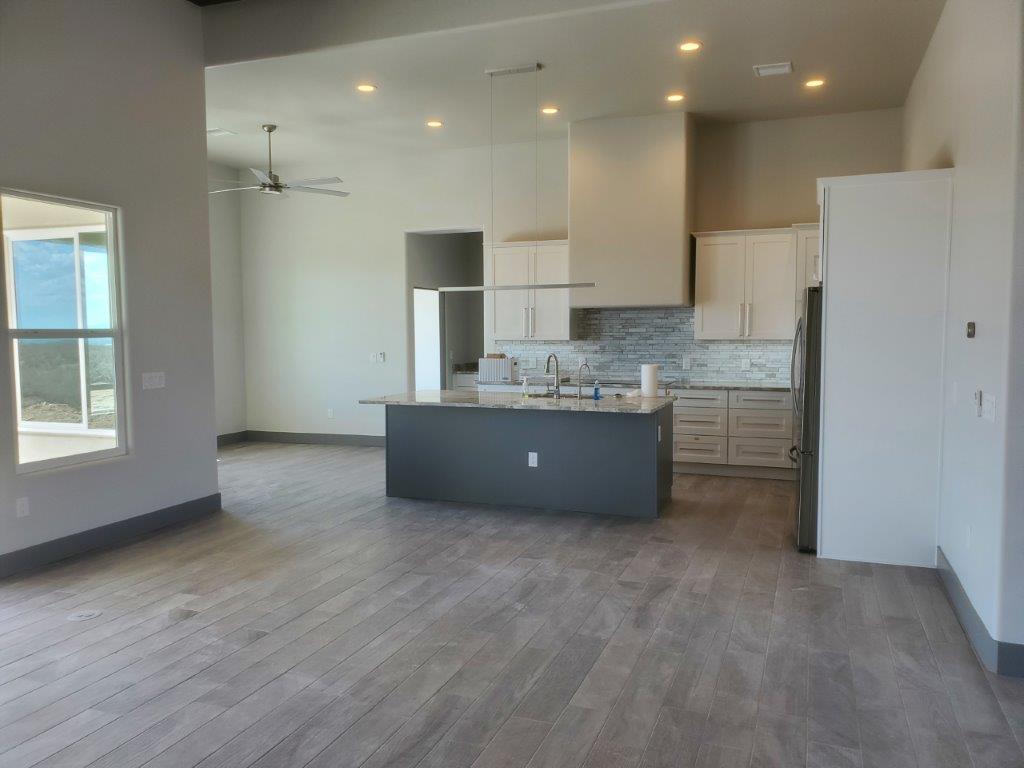
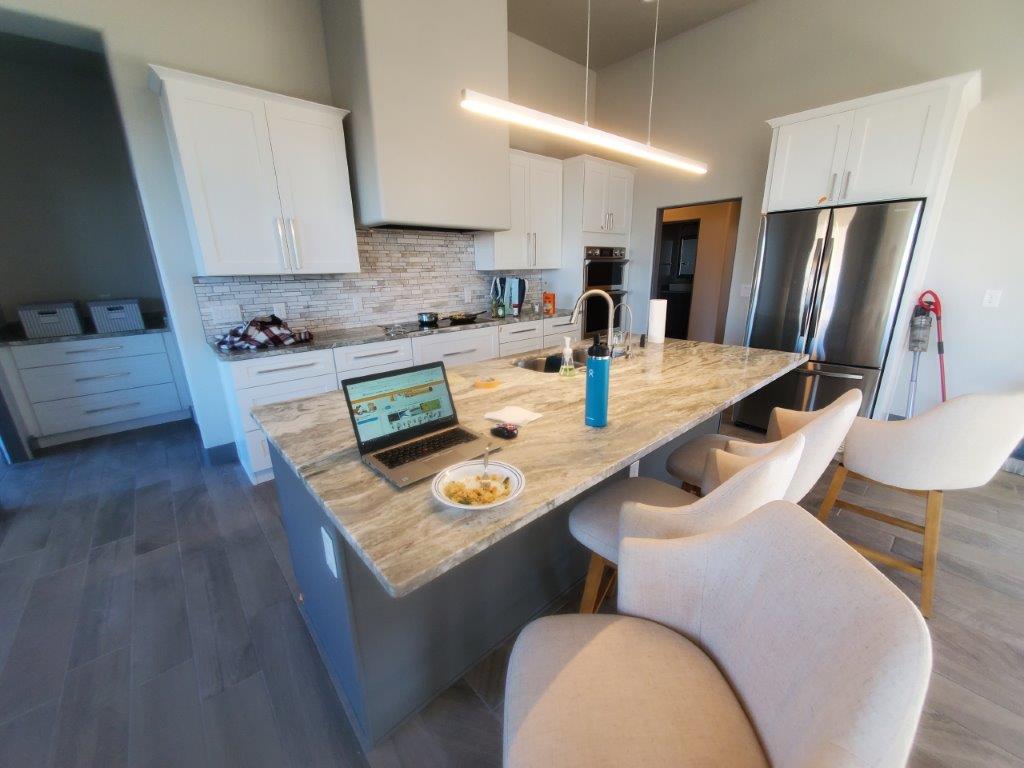
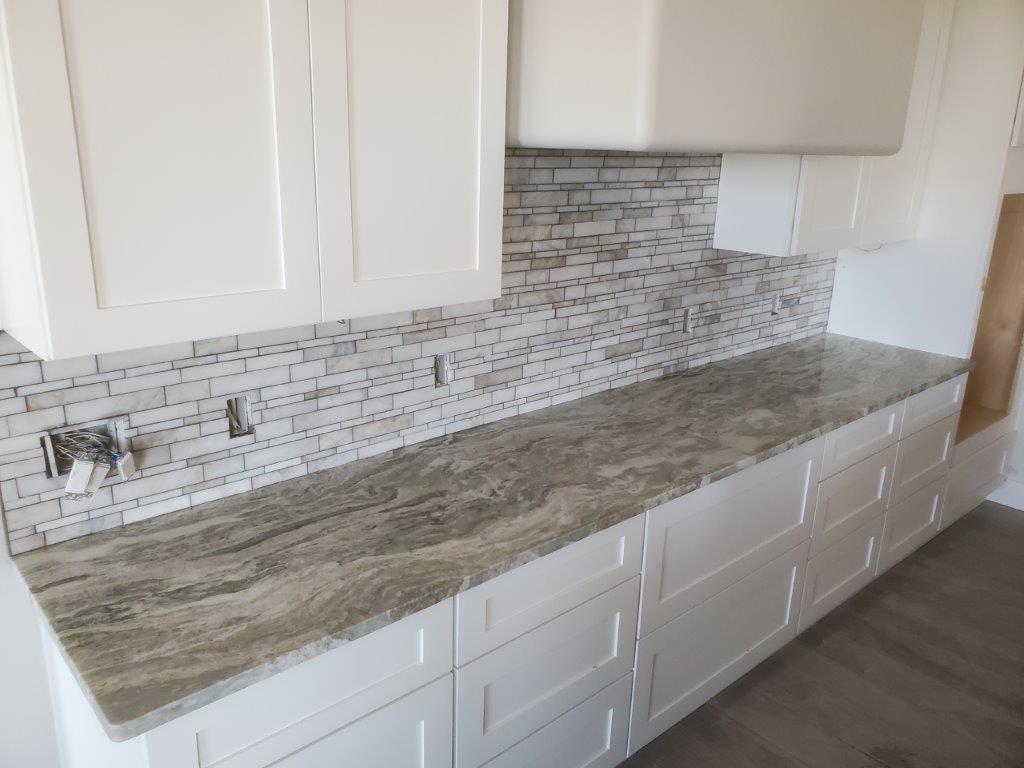
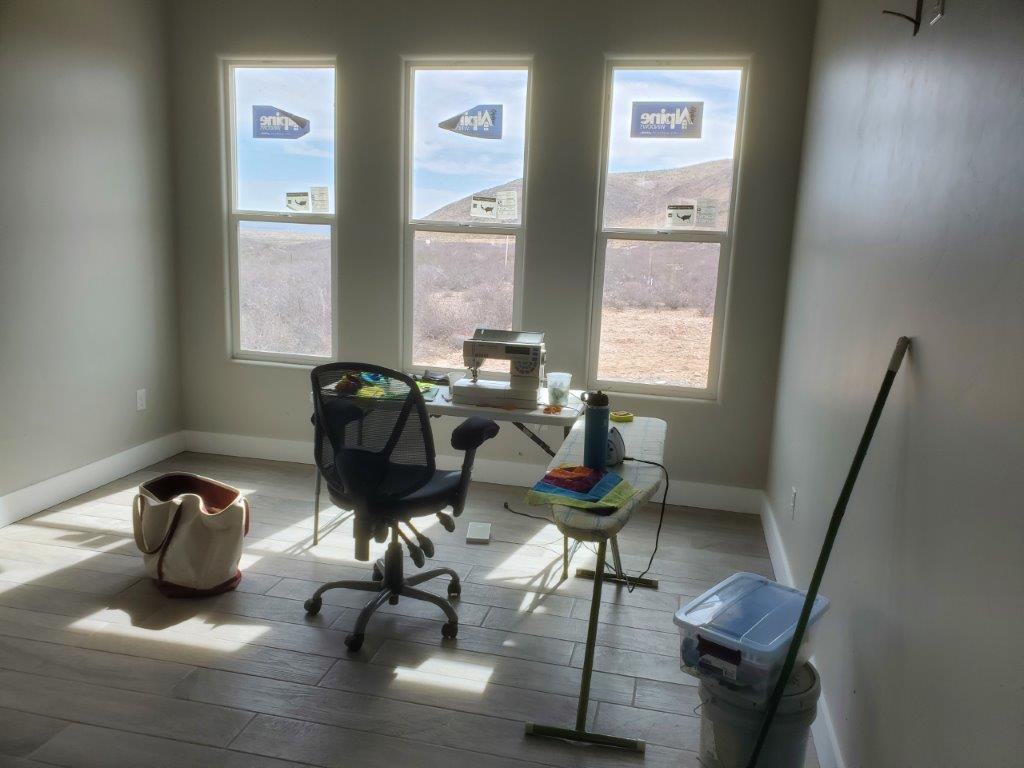
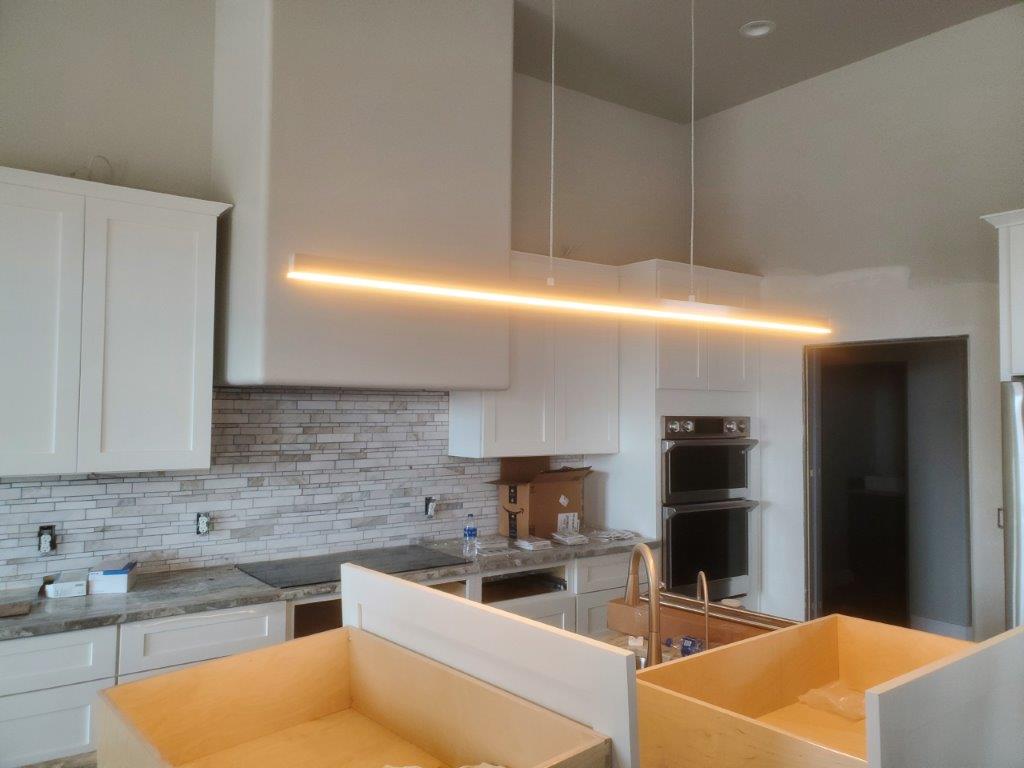
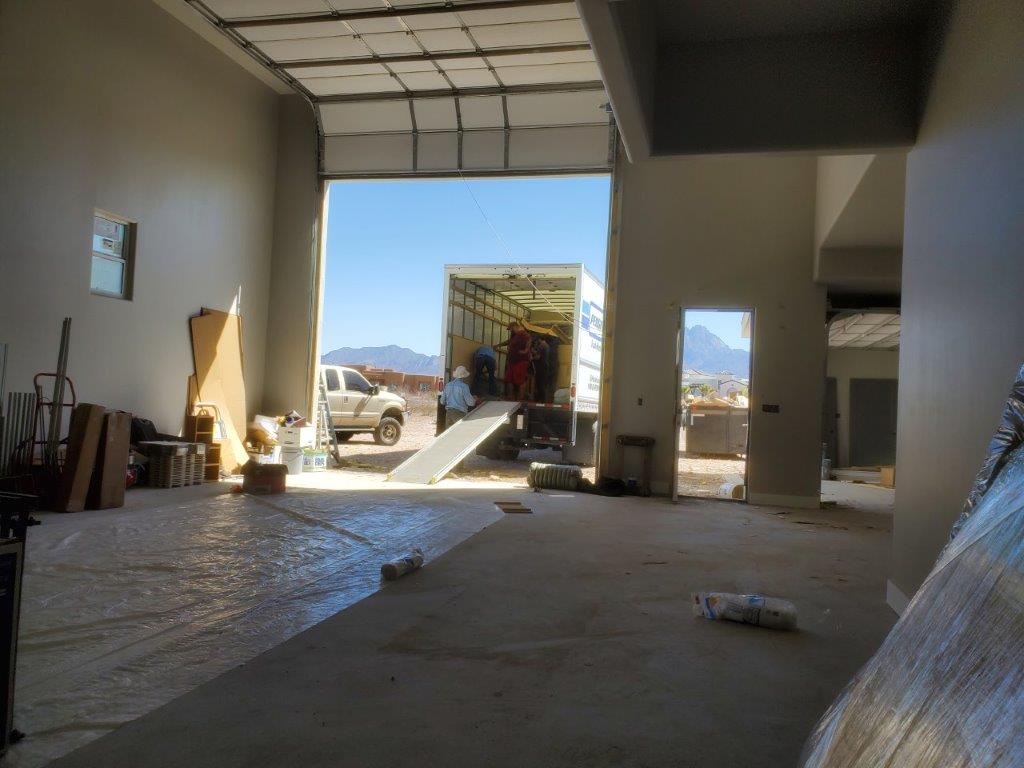
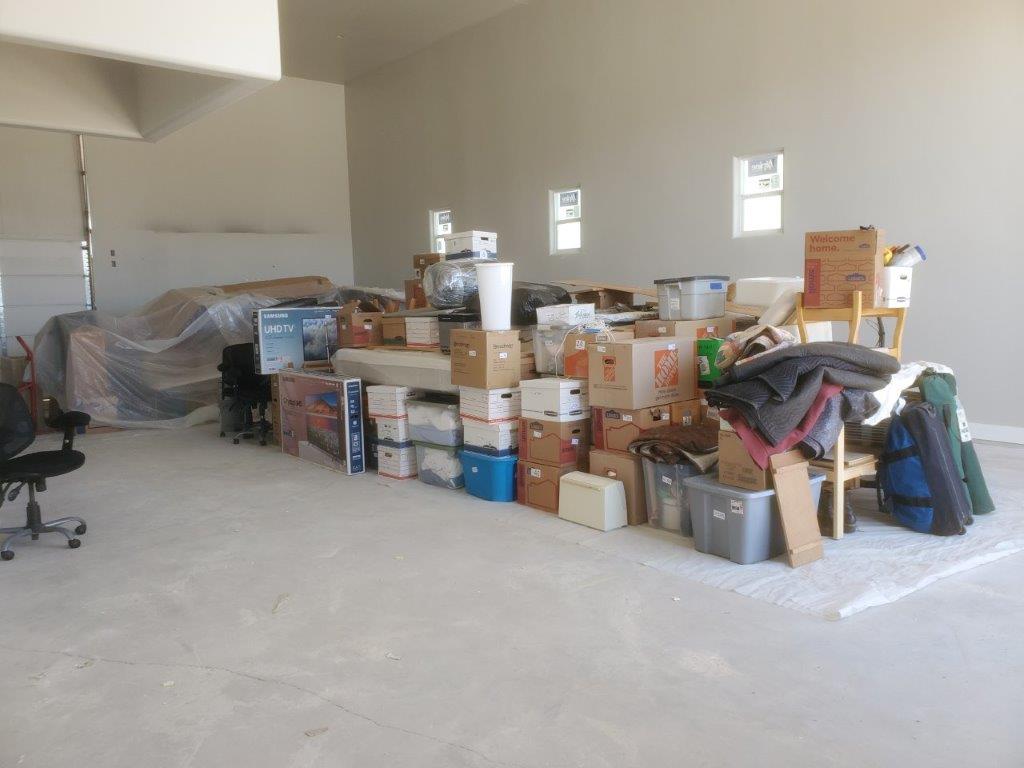
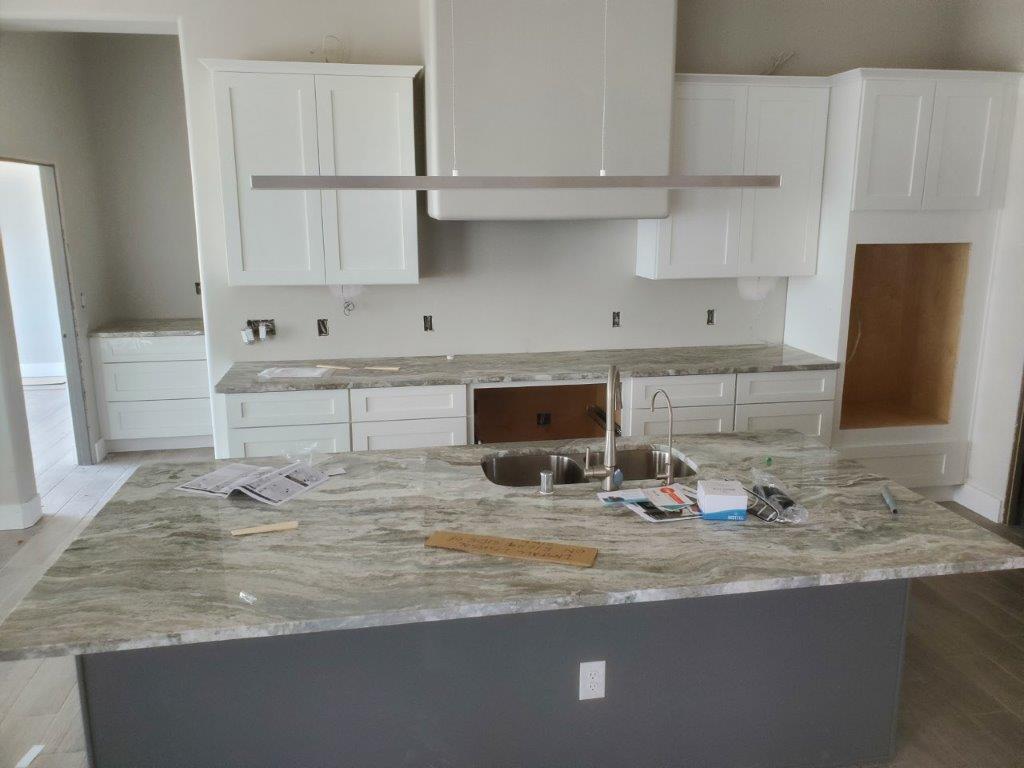
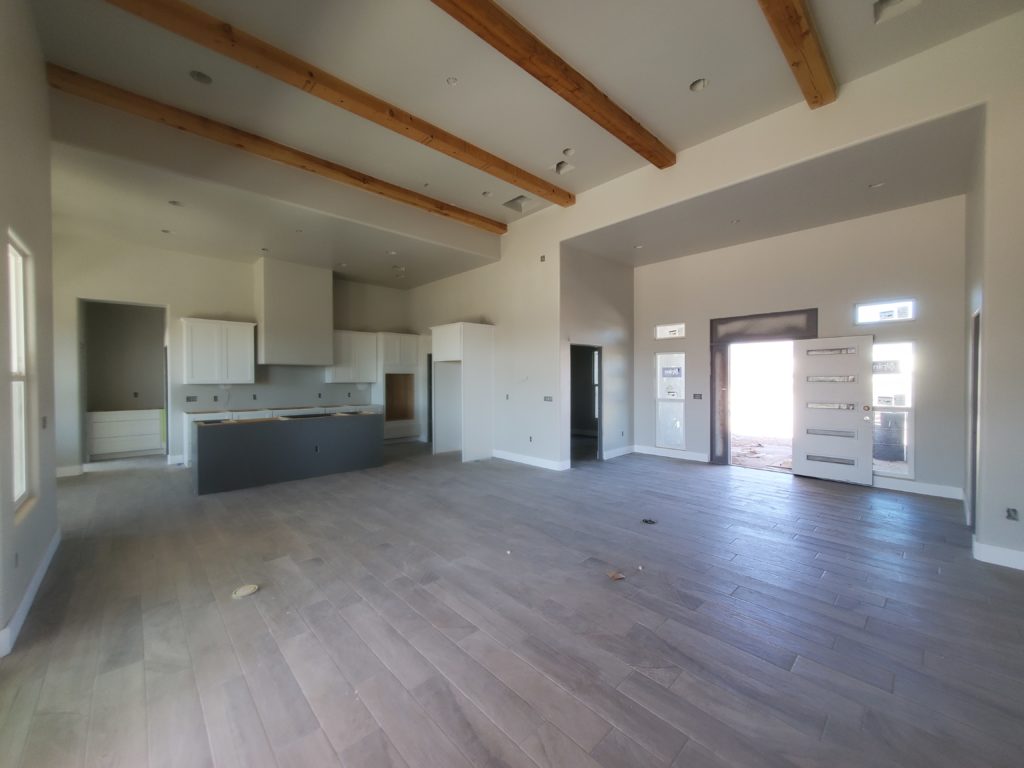
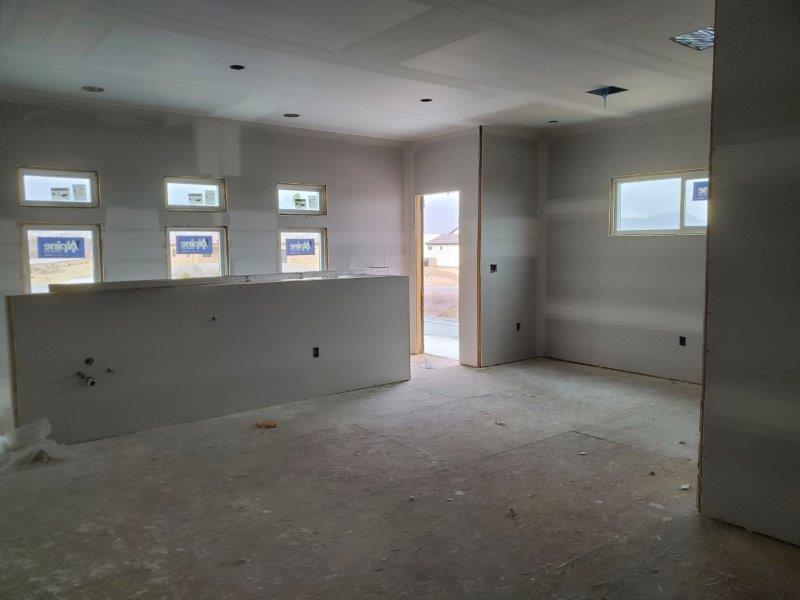
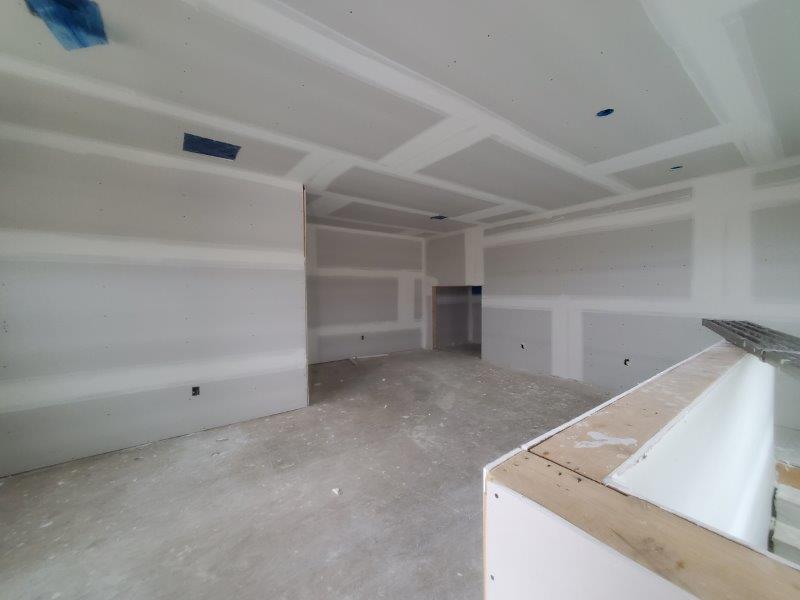
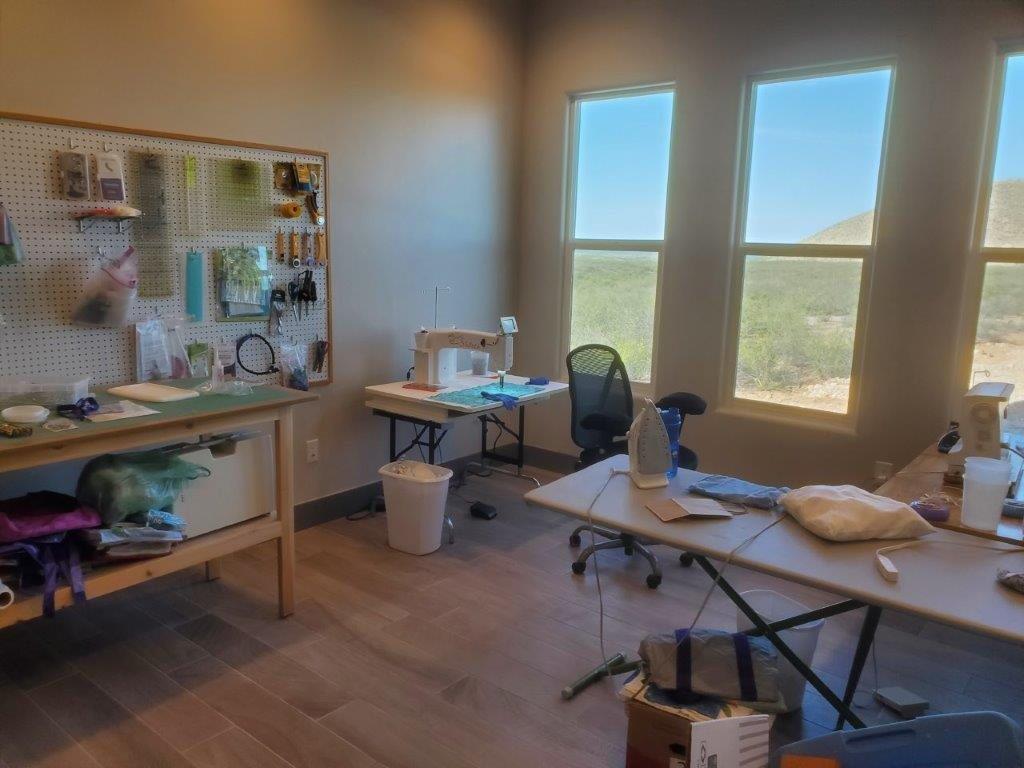
Inside the house, we got some “stuff” set up.

I got the pantry loaded up….and I still have more space for more “stuff!”
The door into the panty swings both ways AND there is a motion sensor for the lighting. So if your hands are full, there is no fumbling for a door knob or a light switch. I’m loving it!

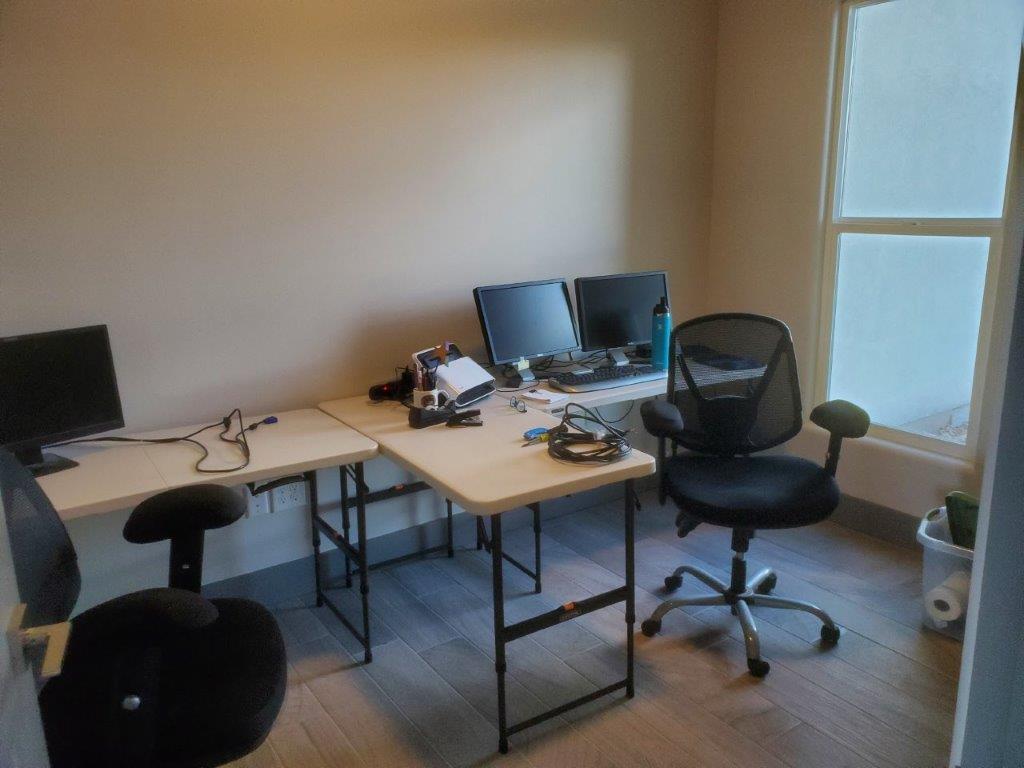
The office is set…for the time being. We got quotes on office furniture. OUCH! For now, three folding tables from Home Depot are doing the trick. It’s a heck of a lot cheaper! We’ll get furniture later.

I’m sure we will have no trouble repurposing these tables.

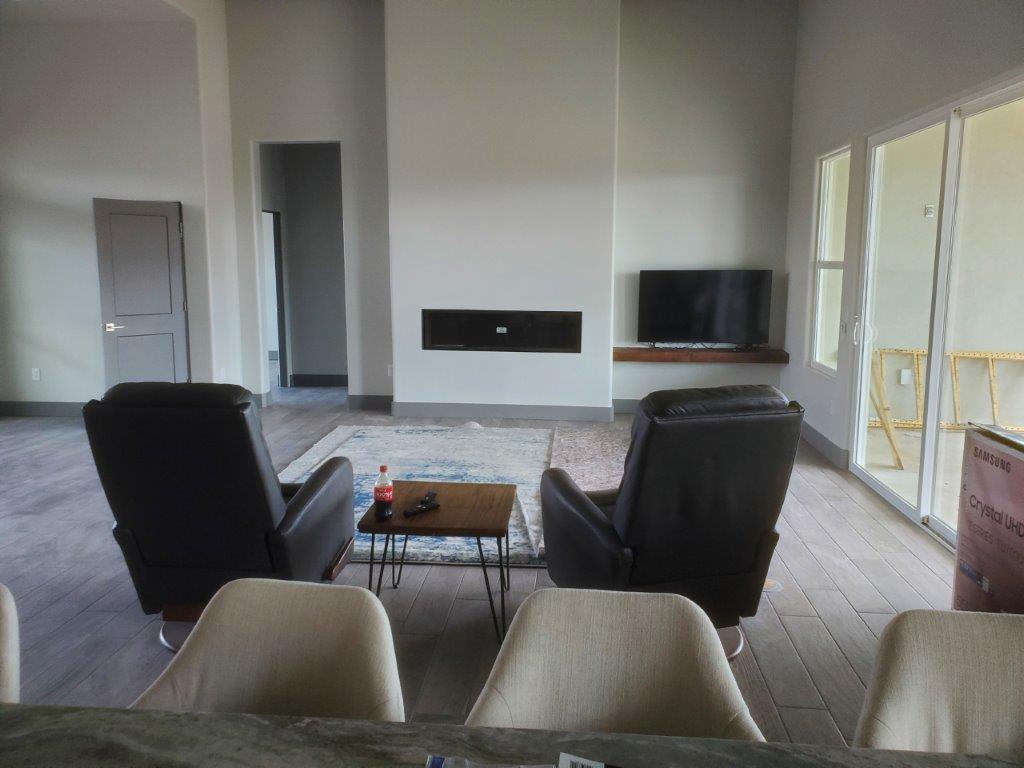
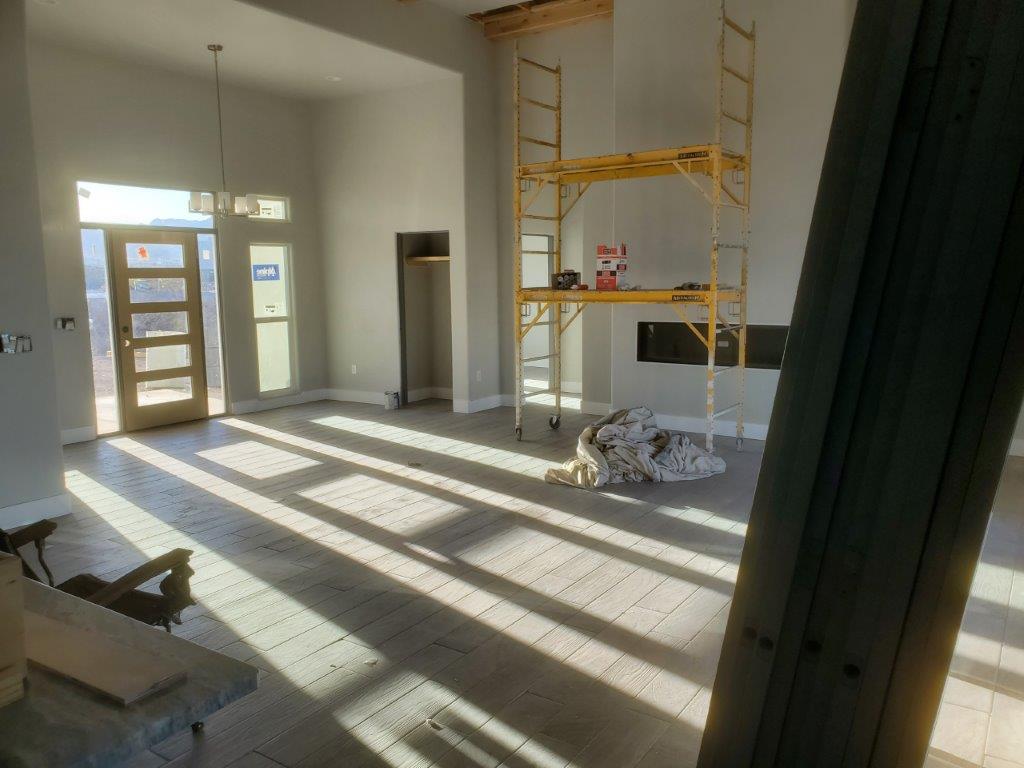
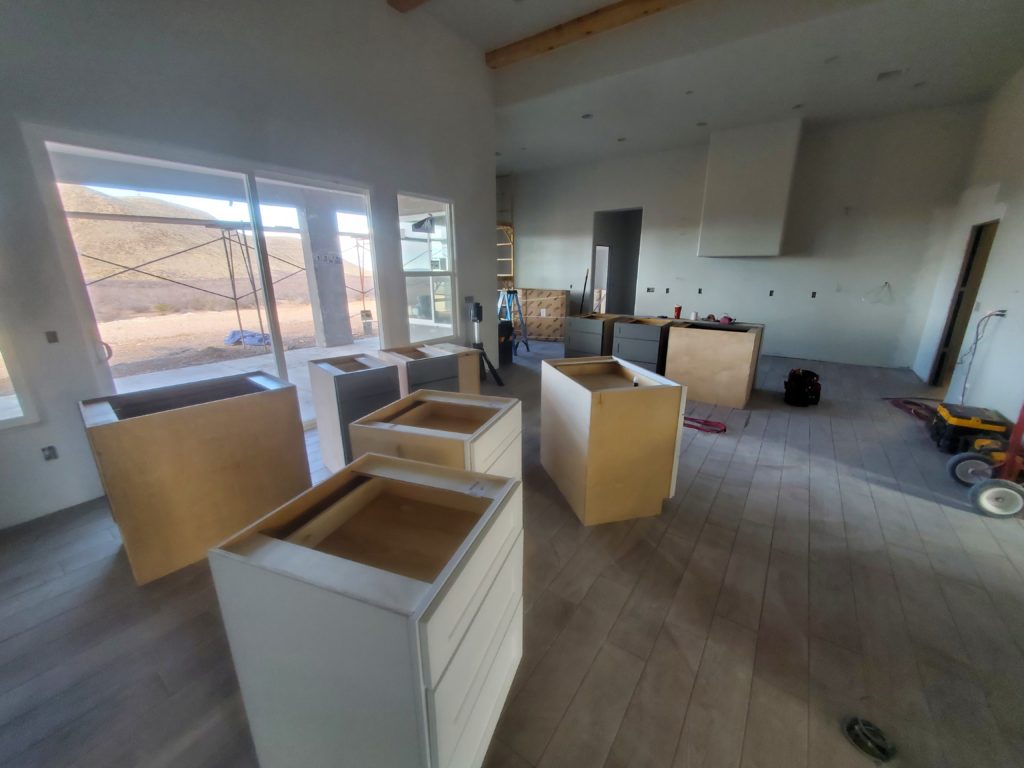
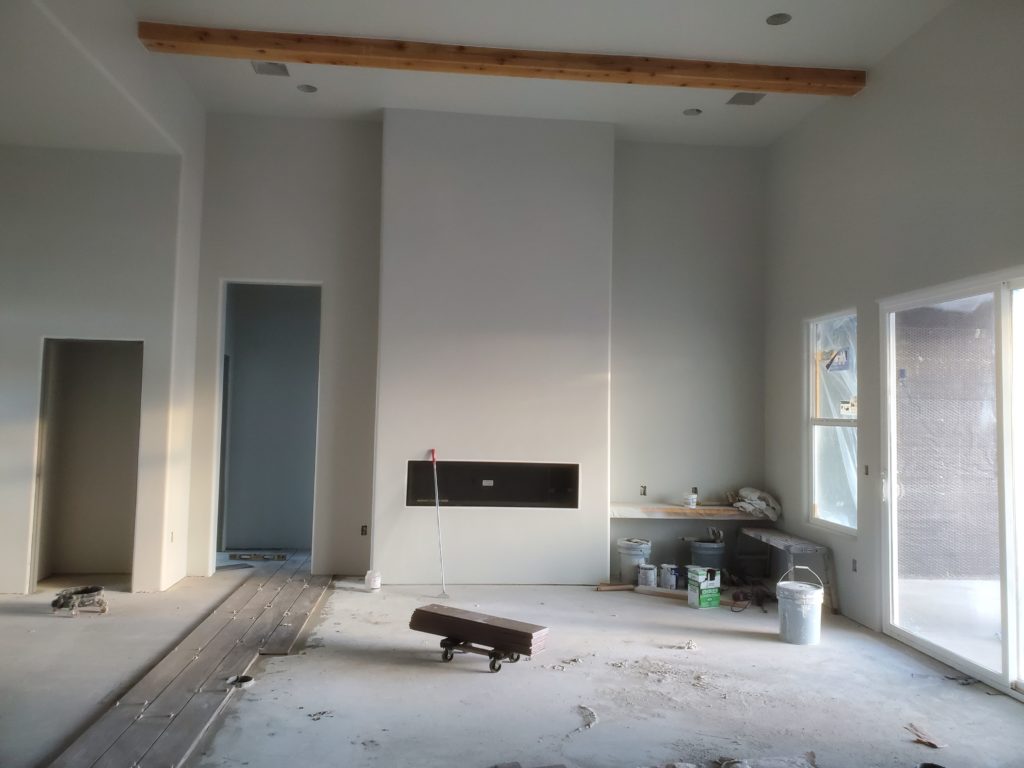
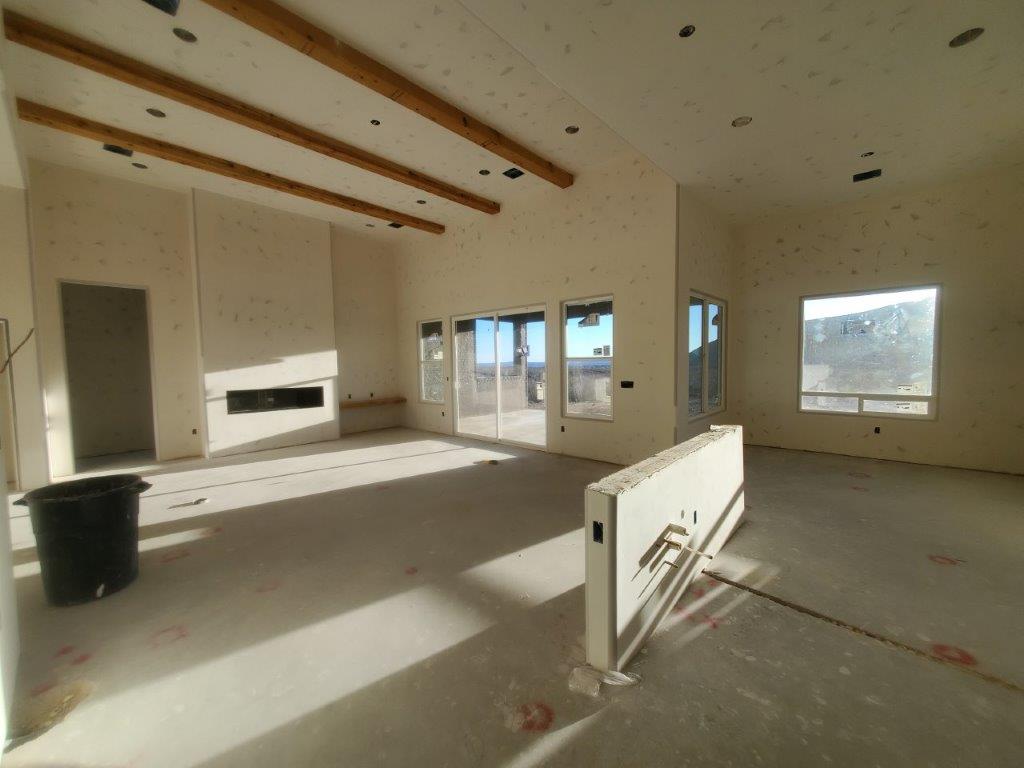
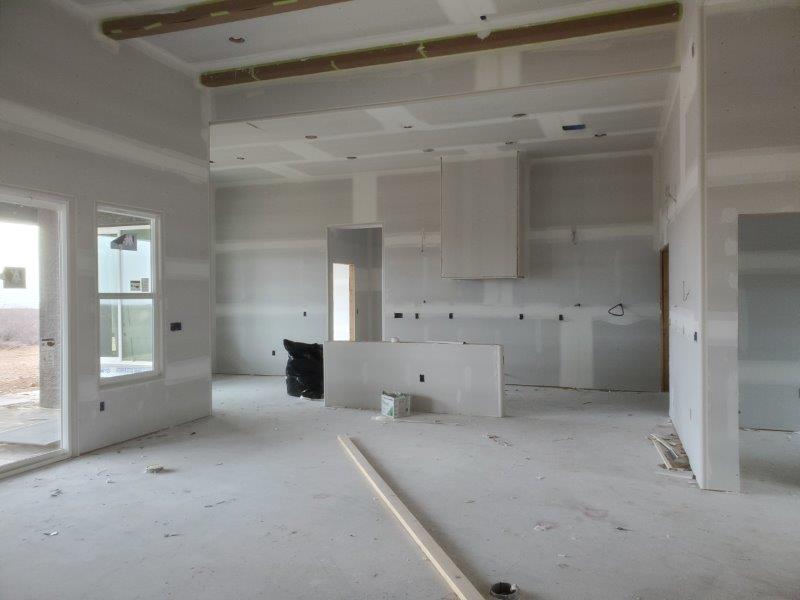
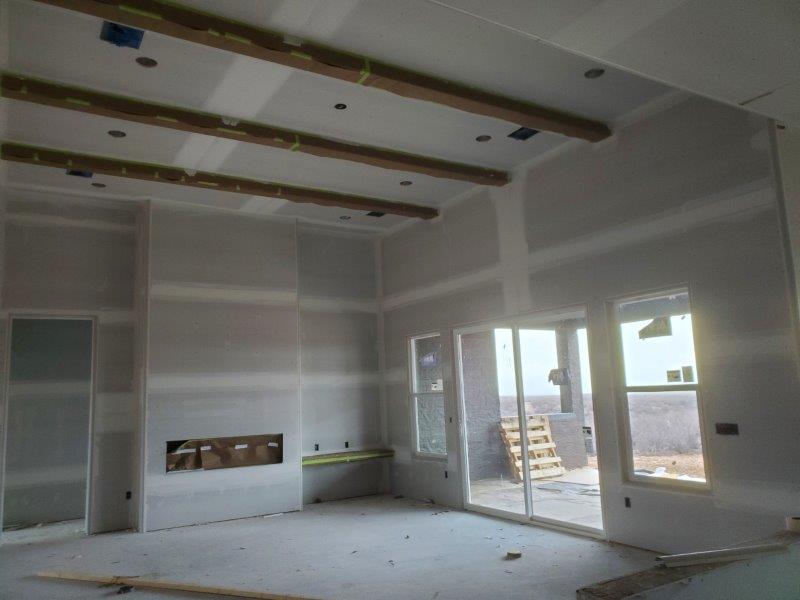
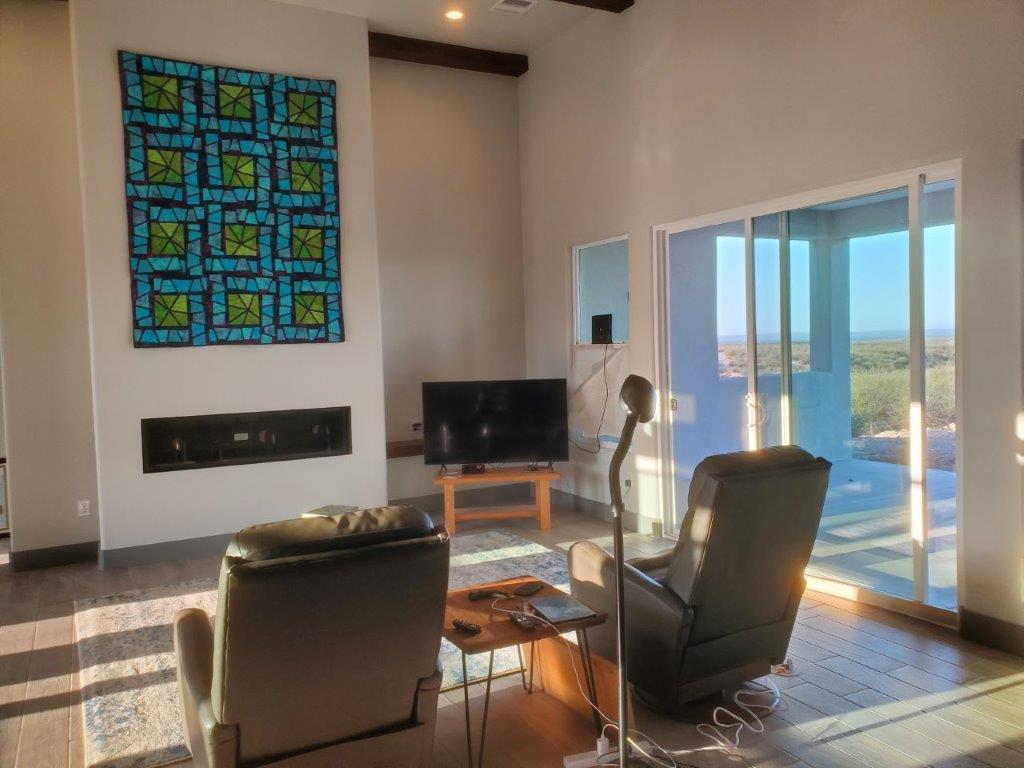
The great room is like an echo chamber since we have very little furniture and no window treatments. So we made an attempt to kill the noise by hanging a quilt over the fireplace.

I loved the way the quilt looks! Unfortunately, the command strips holding it up didn’t want to stick for longer than three days. Yup, down it fell. So we are back to a bare wall. More on that wall in a minute.

I also got all my sewing boxes unpacked. Not necessarily put away, but unpacked.

The dear husband got my pegboard hung up. And you might notice a new-to-me sewing machine in the far corner. One of my new quilting buddies was selling her sit-down midarm sewing machine. I’ve already quilted one quilt on it.

On to the unfinished items….

It has again been a “two steps forward, one step back” scenario.

Water heater

We have a tankless natural gas water heater. Looks nice, doesn’t it.

Water heater mounted on the wall in the mechanical room off the car garage. Note the PVC pipes coming out the top.

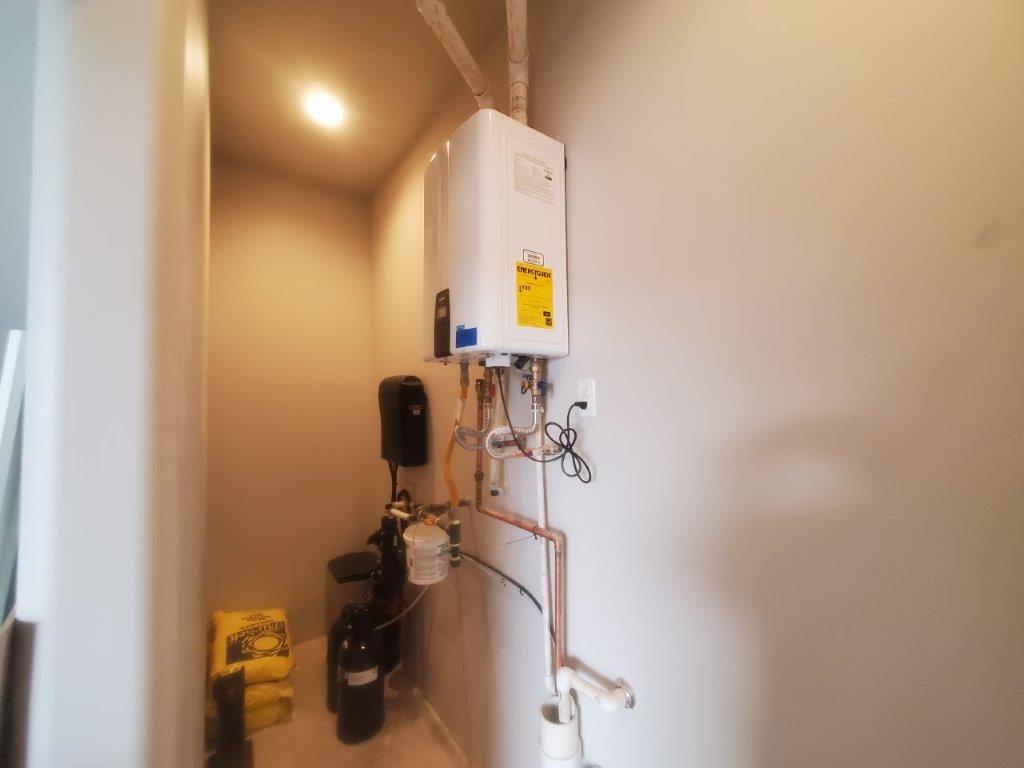
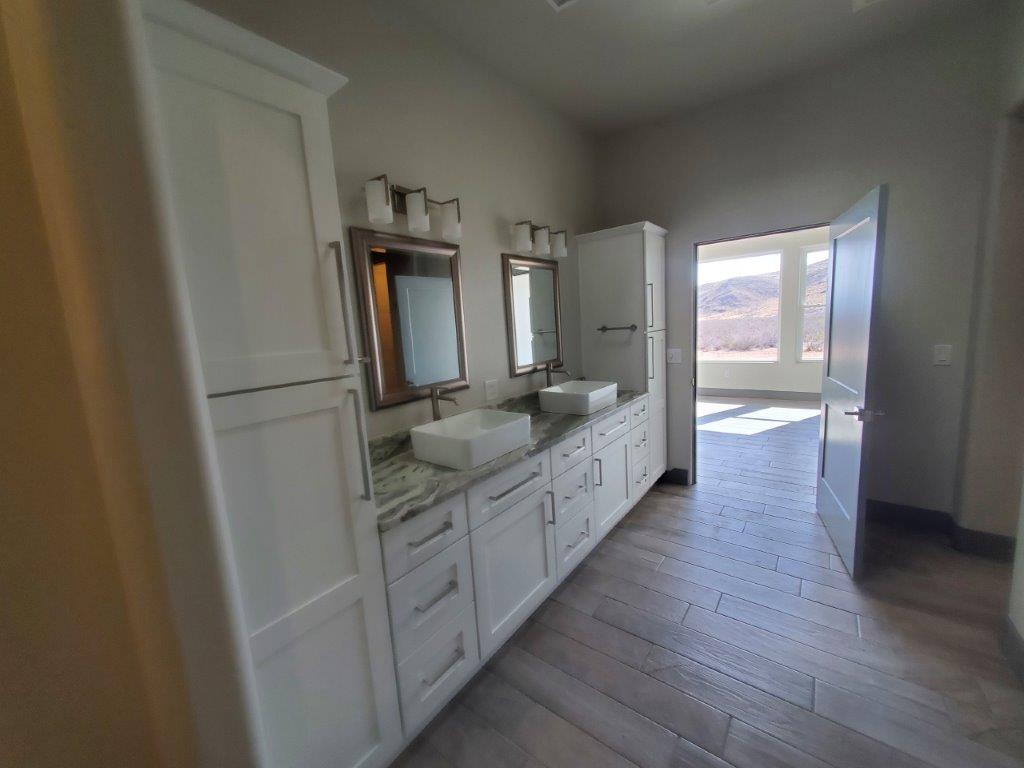
Every time we pulled hot water, we were hearing gurgling in the master bathroom. I thought the hot water pipes were very noisy. Then the water heater started failing (as in shutting down) and displaying an error code on the screen on the unit. What the heck? We had the plumber telling us one thing, the company rep telling us another, YouTube videos telling us another thing.

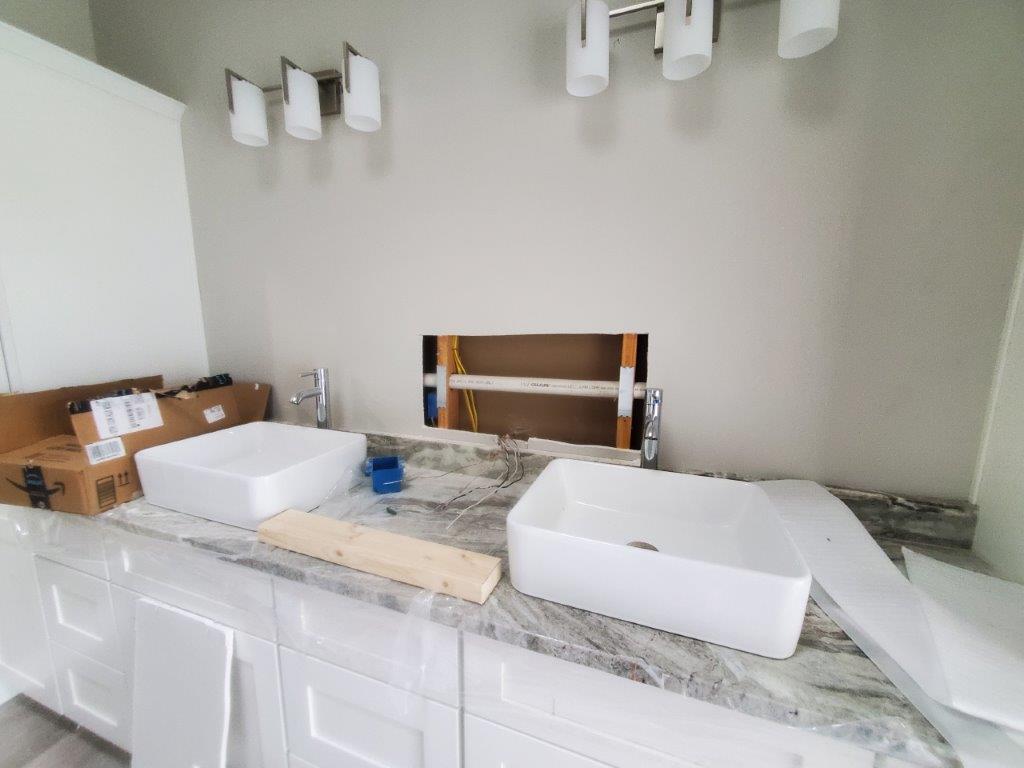
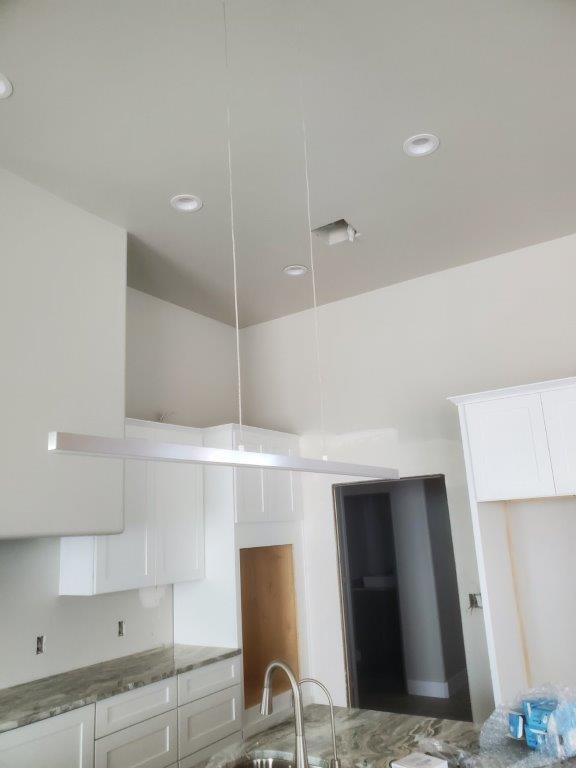
After a few weeks, the cause of the shutdowns and gurgling was found. Remember those PVC pipes? One of them is for the exhaust gases from the gas combustion which heats up the water. The pipe goes up, then across the ceiling of the master bathroom, then up again to exit the roof. The horizontal portion that goes across the master bathroom ceiling was supposed to be sloped upward. It wasn’t…it was sloped downward. The condensate (i.e. water) in the exhaust gas was accumulating in the pipe restricting the flow of the exhaust gas…hence the gurgling we would hear. The plumber should have known better.

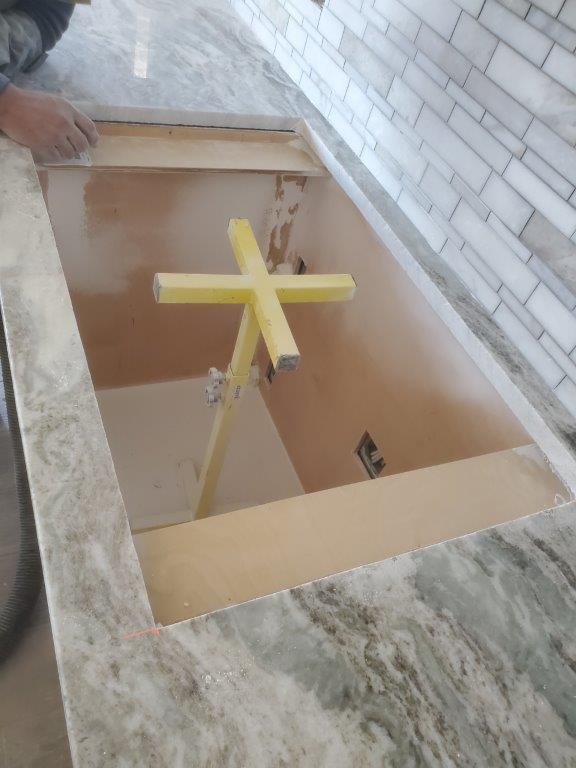
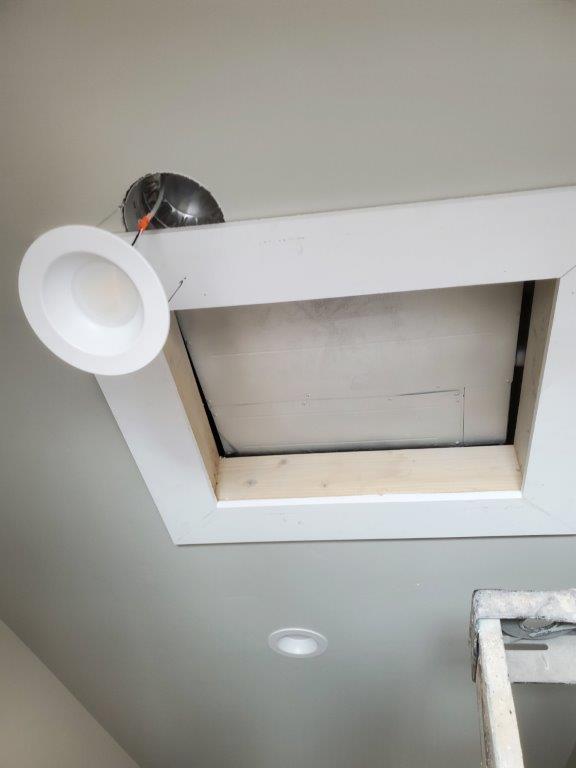
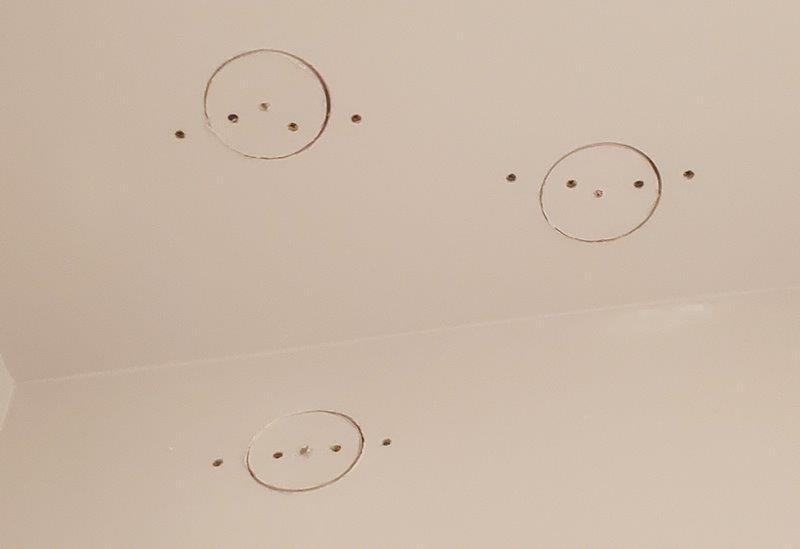
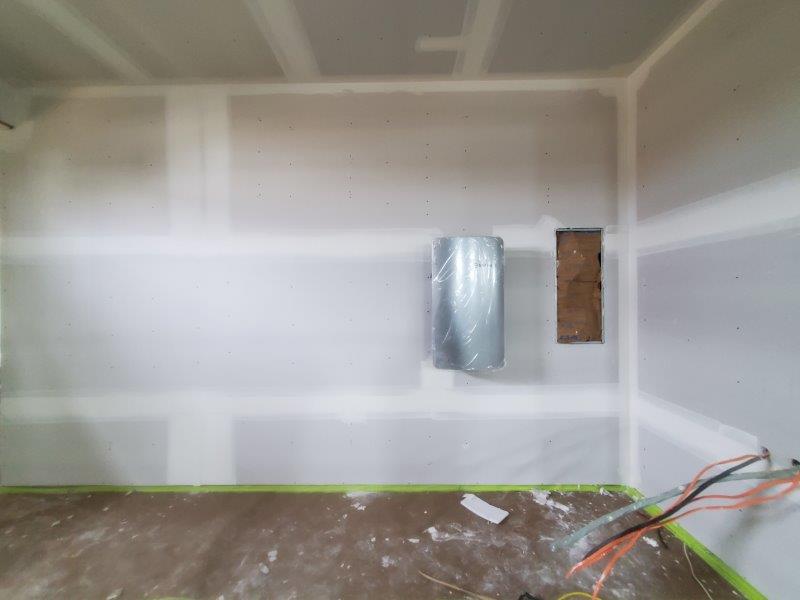
The solution? Fix the pipe in the master bathroom ceiling.

Drywall Hole #1

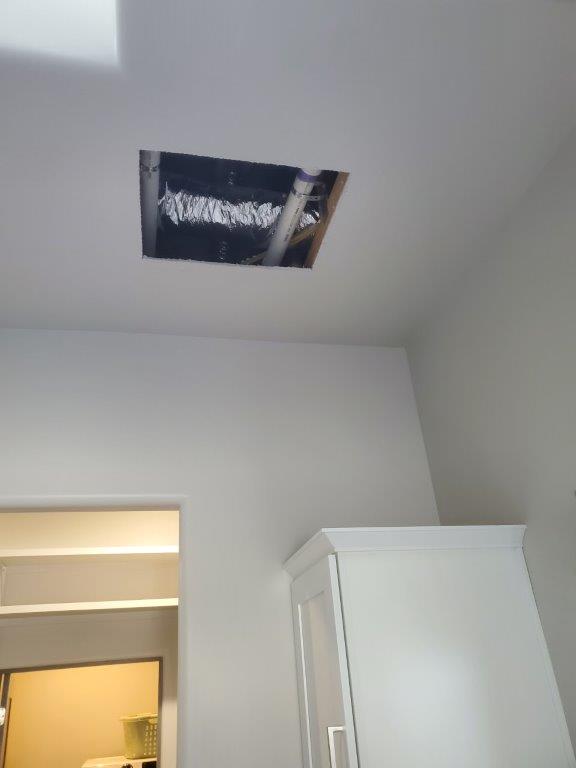
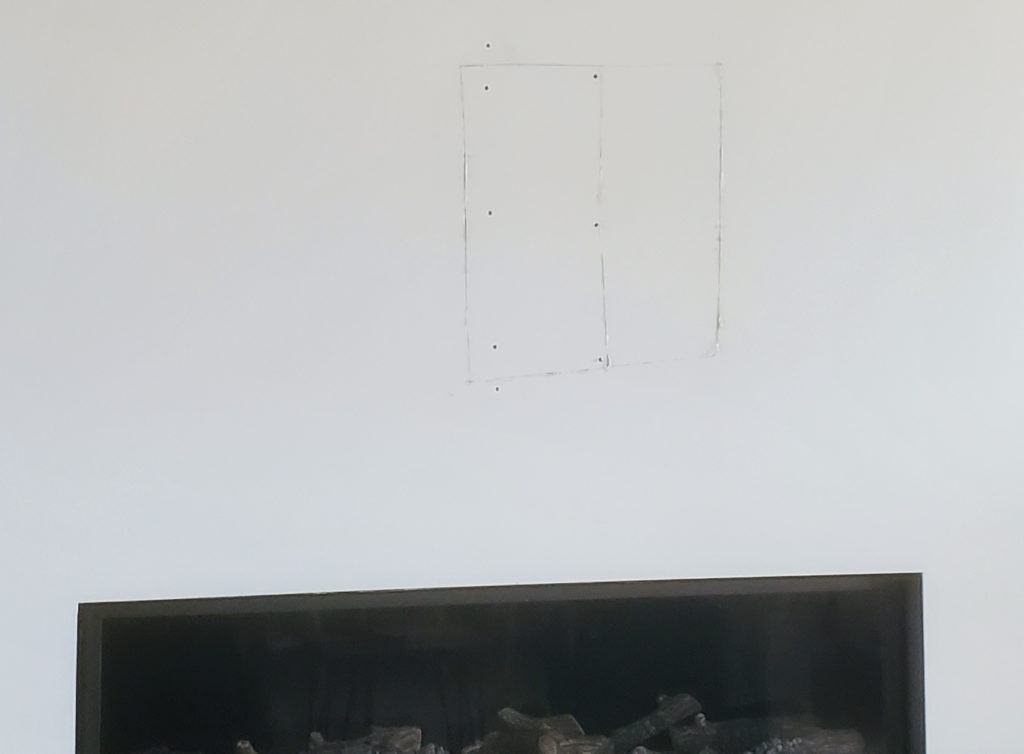
Yup, that’s a hole up there in my ceiling. The plumber had to cut through the drywall. The straps holding the PVC pipe were removed and the pipe adjusted to the right angle. Things work properly now, but I’m still waiting for the drywall patch/paint in my ceiling to be finished.
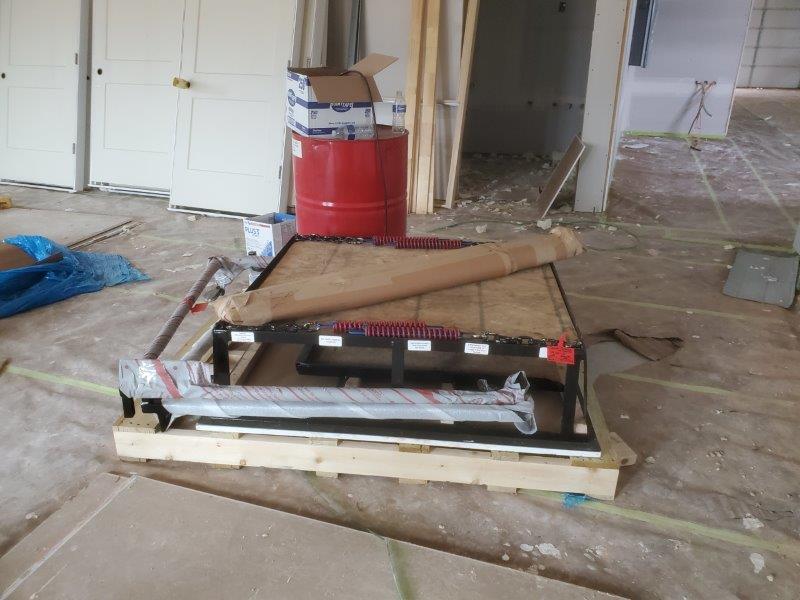
Fireplace

You think that was bad, wait until you hear our fireplace story.

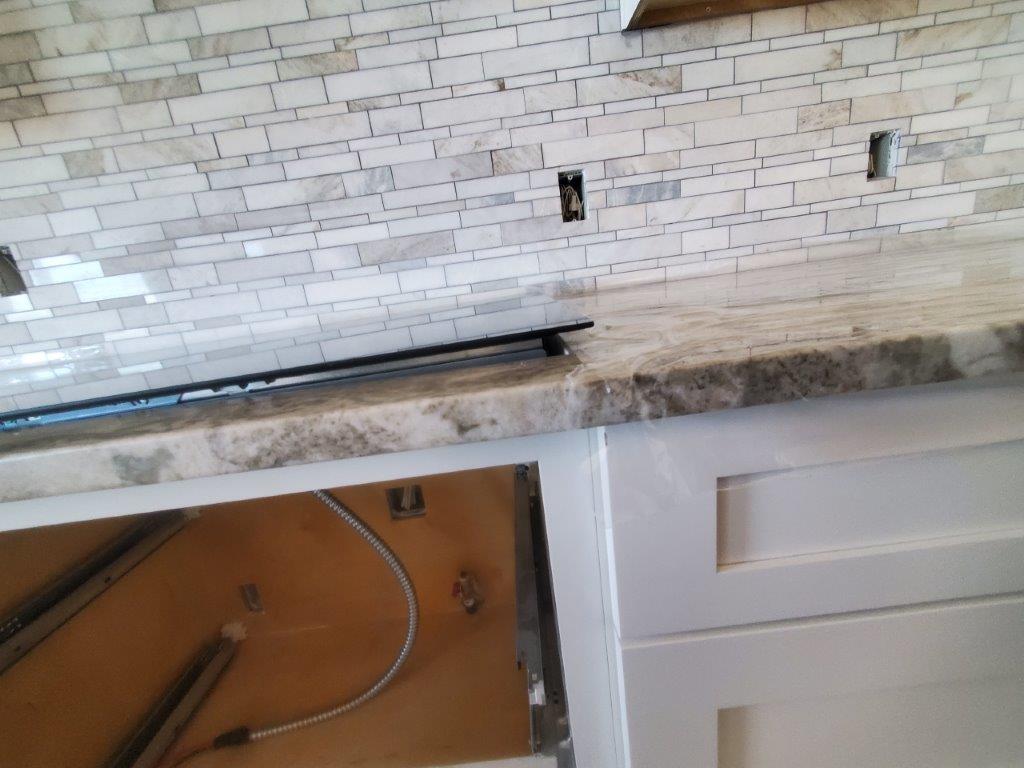
The company that installed the fireplace came out to hook it up. The installer was puzzled because he had no power or natural gas at the fireplace. We knew there was power and natural gas at the fireplace, I have pictures of it!

If you ever build a house, take lots of pictures. LOTS OF pictures. The green arrow points to the gas line, the yellow arrow to the wire.

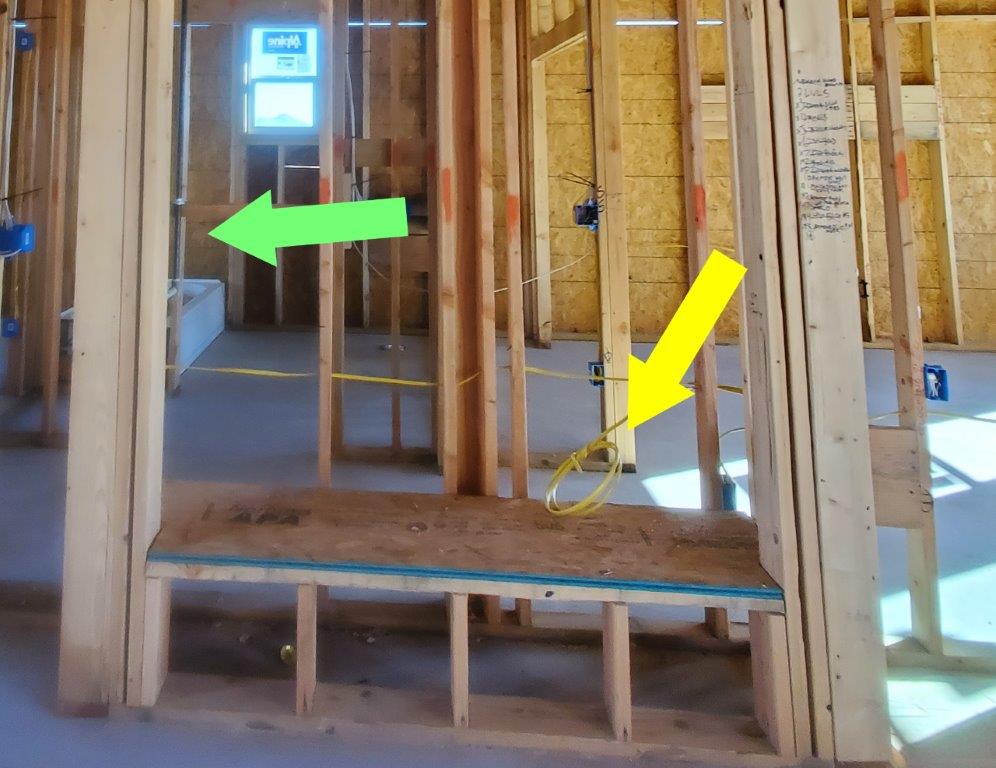
The fireplace was NEVER HOOKED UP before the drywall went up. <insert colorful language here> We were not happy. Of course, the gas and electric were on opposite ends of the fireplace


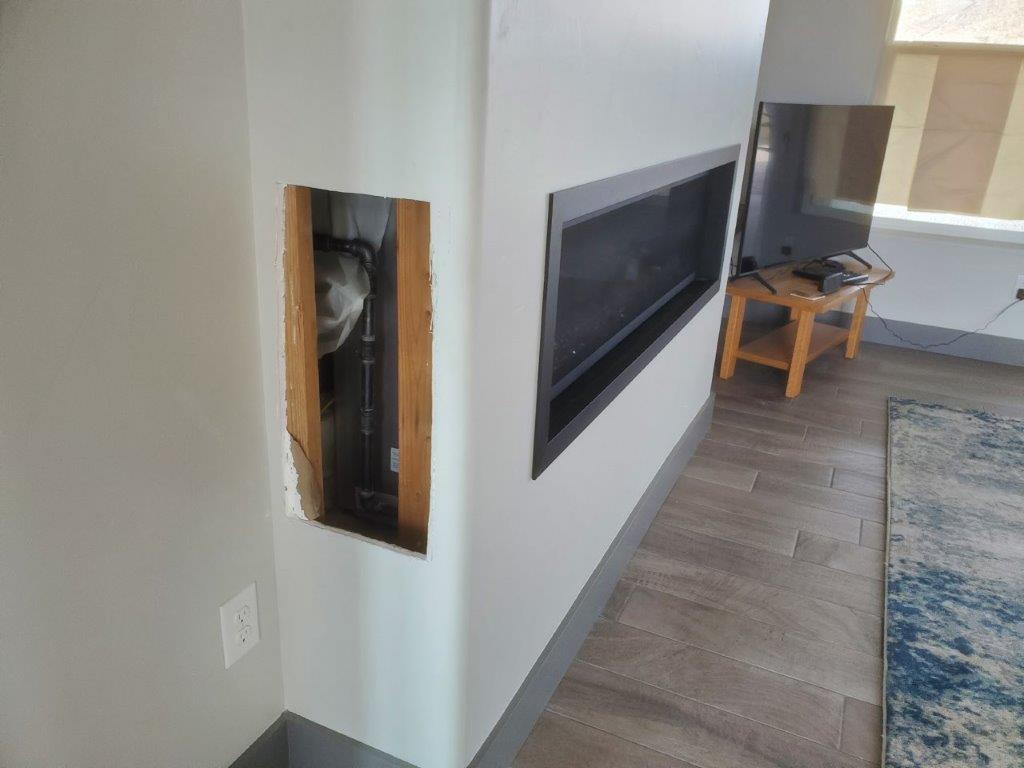
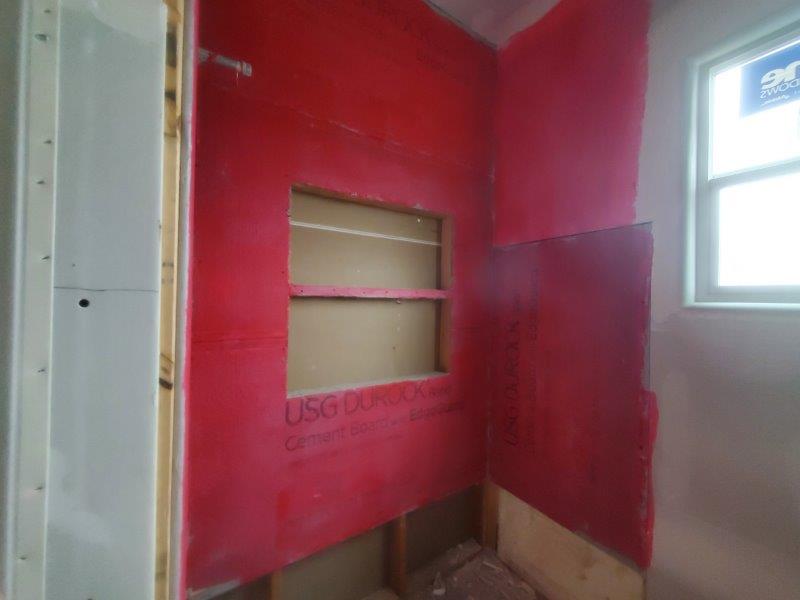
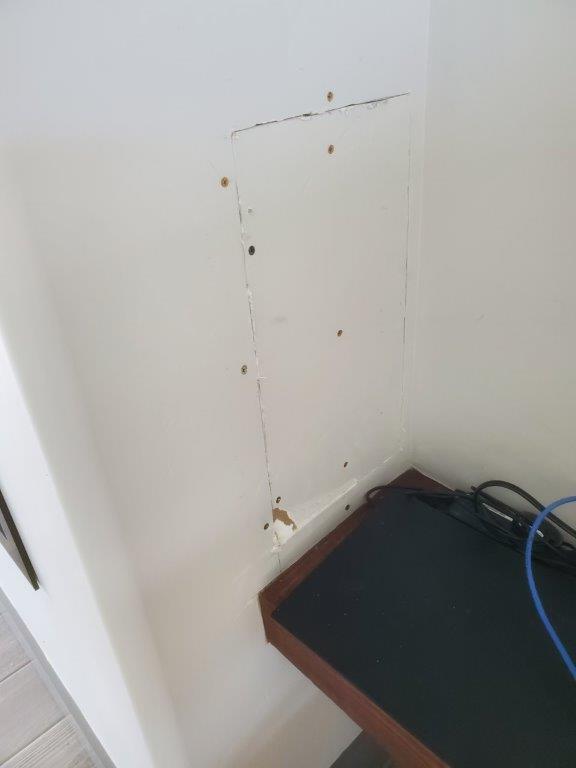
Drywall Hole #2. The plumber cut open the wall and hooked up the natural gas.
Drywall Hole #3. Opposite end of the fireplace. The electric was now hooked up. At least the electrician put the drywall back in.

Phew, we should be all set, right?

Nope.

The fireplace installer came back out to complete the setup and discovered PLASTIC wrapped around the chimney pipe. What the heck? At this point I lost it. Are they trying to kill us? Can you say fire hazard!?!

The crew that sprayed in the foam insulation covered everything to not be sprayed with plastic, mostly windows. But this also included the fireplace.

Again, take lots of pictures. The green arrow points at plastic on the chimney pipe.

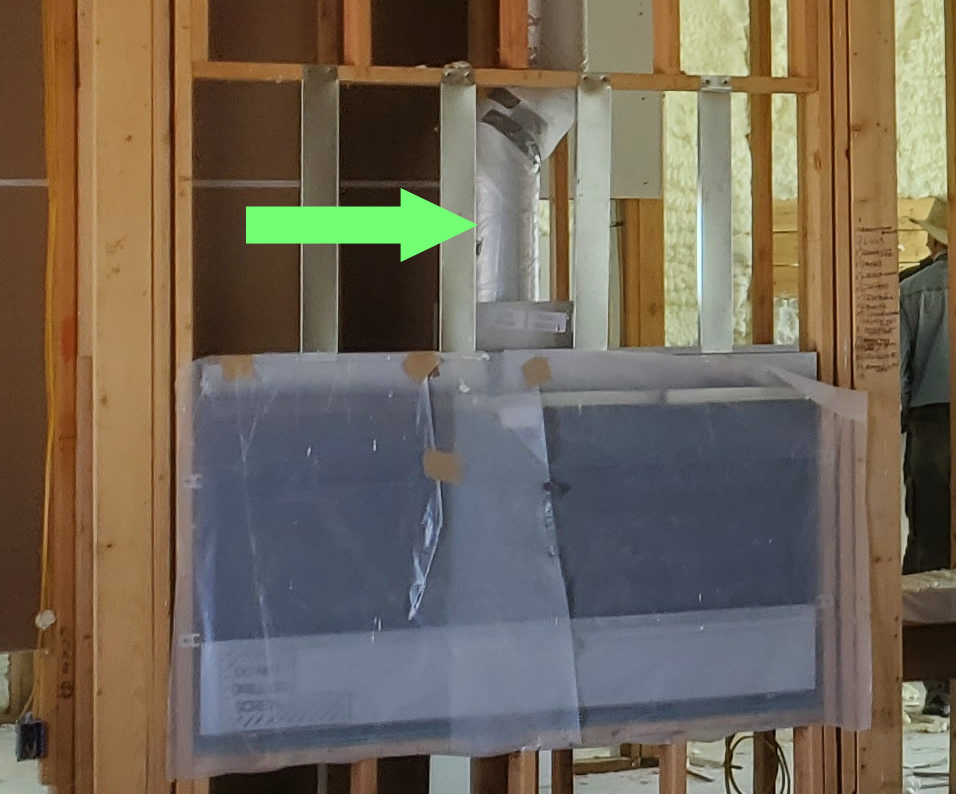
How do we get the plastic off the pipe? Want to guess?

You guessed it. Drywall Hole #4.

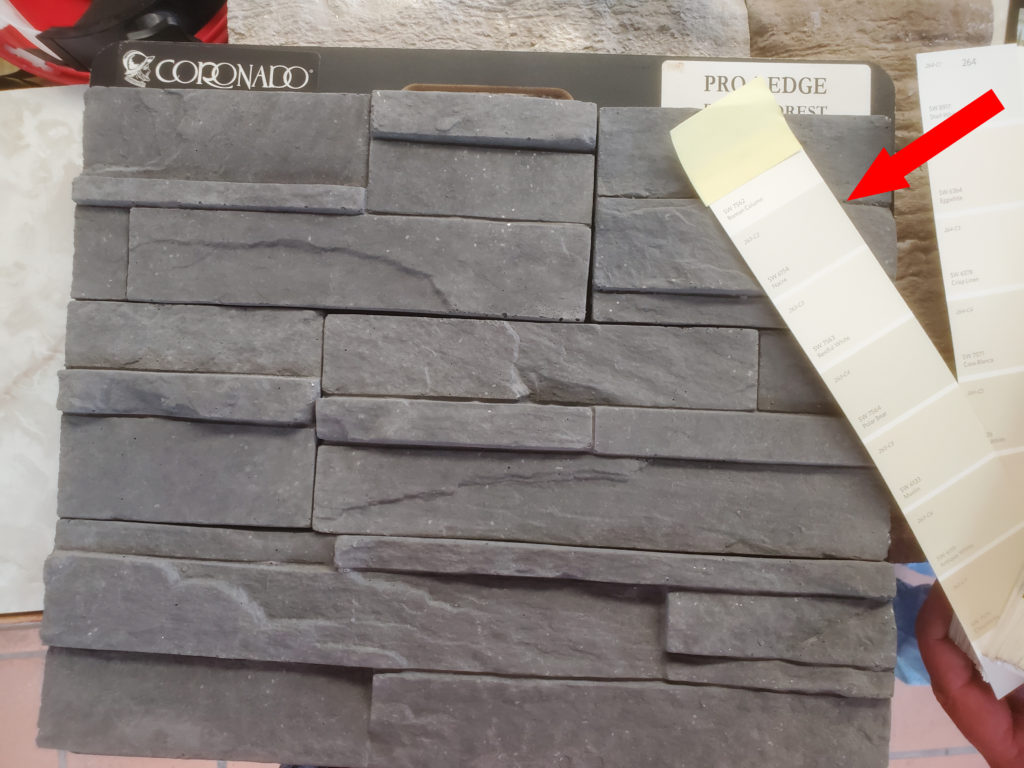
The fireplace works now. Next step is to put the stacked stone on the fireplace. Easy, right?

Nope.

The mason started put the stone on the wall, but quickly discovered the floor wasn’t level. A 2×4 was put down at the floor with the top surface of it being level. He’ll go back later and fussy cut the stone to go down again the floor. But wait…there’s more. Look at top of the stone. The stone is not parallel with the fireplace. The fireplace is .75″ lower on the right side when compared to the left side. Time for me to blow another gasket.

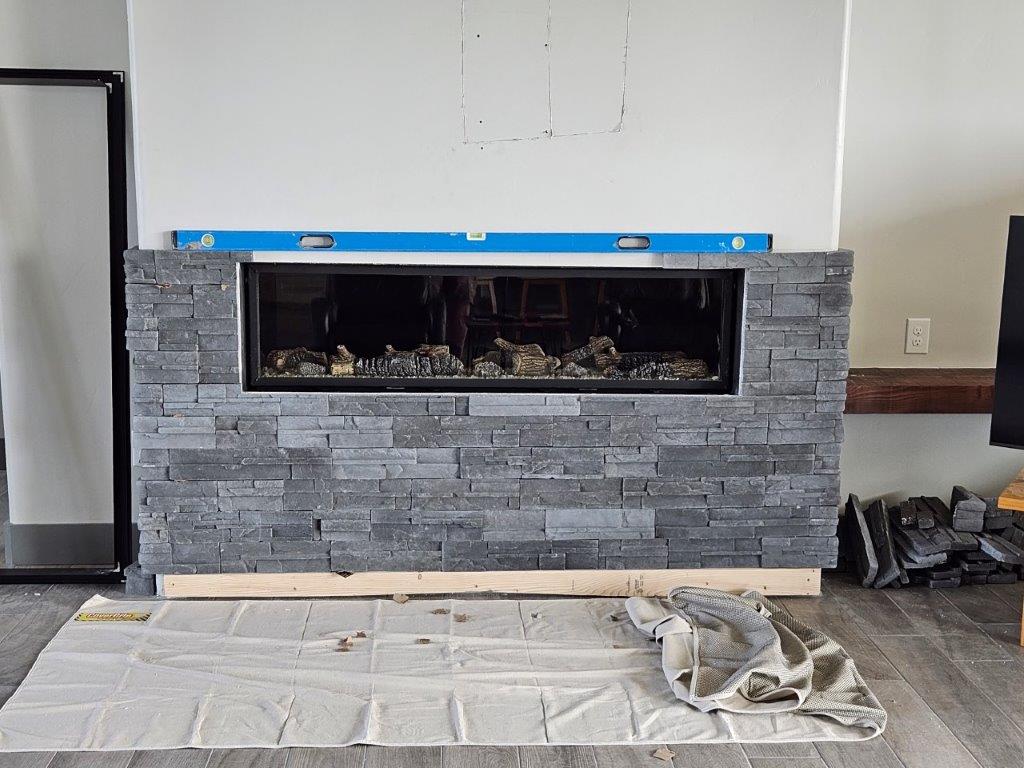
The fireplace is NOT level!!!!! We halted the stonework and got the builder over here ASAP. He agreed it’s not right. So, now the fireplace installer has to come out next week and level the fireplace. I’m sure it will result in Drywall Holes #5, 6 and 7.

So, that’s what has been happening here. Lots of frustration and the house isn’t finished. It will be, but so many of these issues should not have happened. The work crews here are all about speed. Instead of taking a few minutes to do something right they rush in, throw something up, then rush out. The result, they end up getting called back multiple times to fix their errors. Don’t you think it would be more efficient to take a minute and do it right the first time?

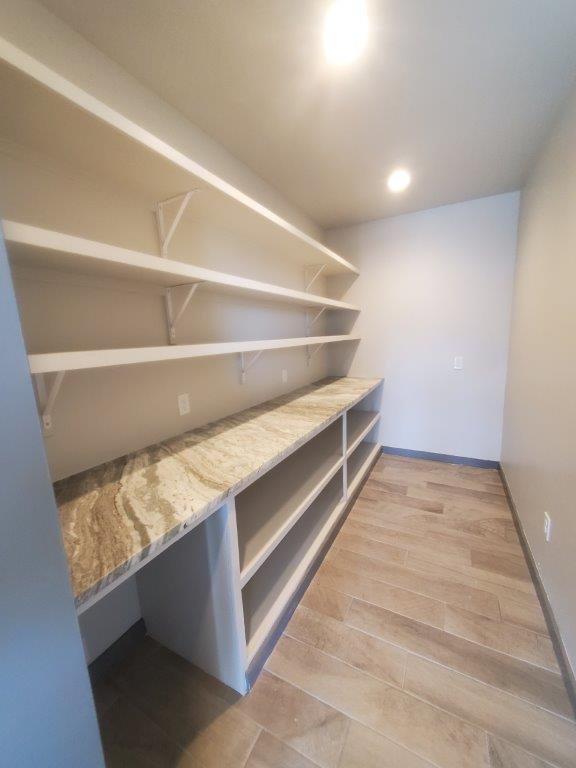
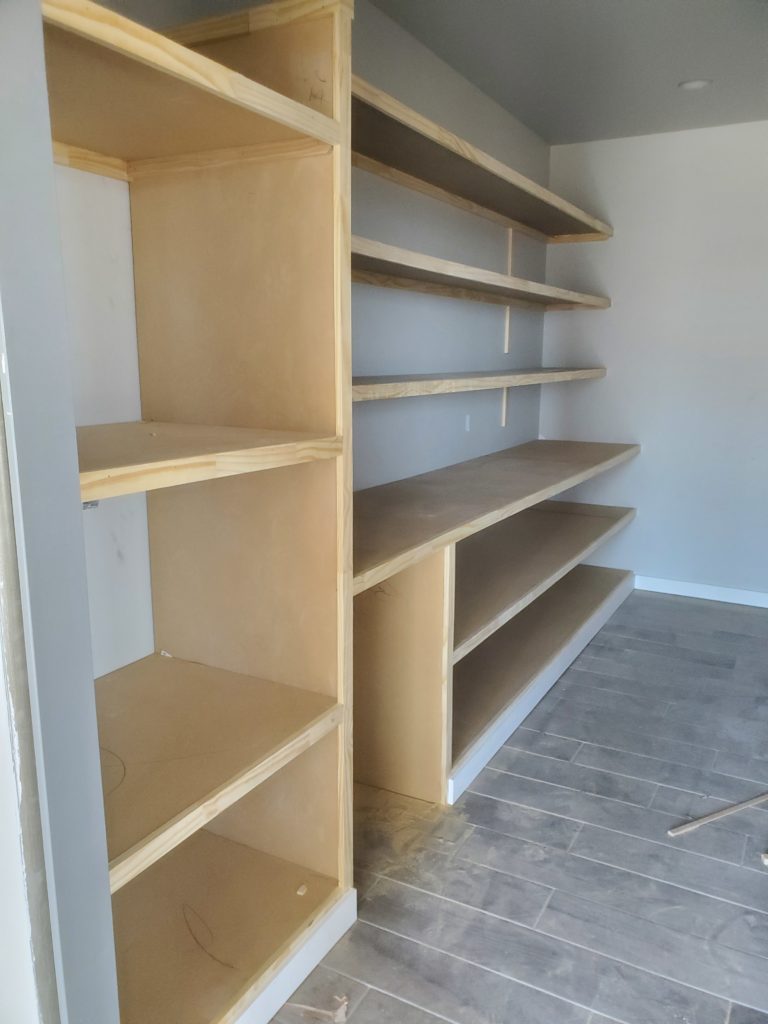
Along with these issues, just getting the builder to push on the crews and get them here has been frustrating and time consuming. And the “rush in/ rush out do lousy work” mentality. So the husband has been tackling many of the smaller jobs. Installing all the support brackets in the closets and pantry, putting up house numbers, adjusting door hinges, hanging light fixtures, and many other small tasks. Isn’t this what we have a general contractor for? With the house months beyond the ‘absolutely be done by date’ we figure the only way it will finish in a timely manner is knock off as many small jobs as we can.

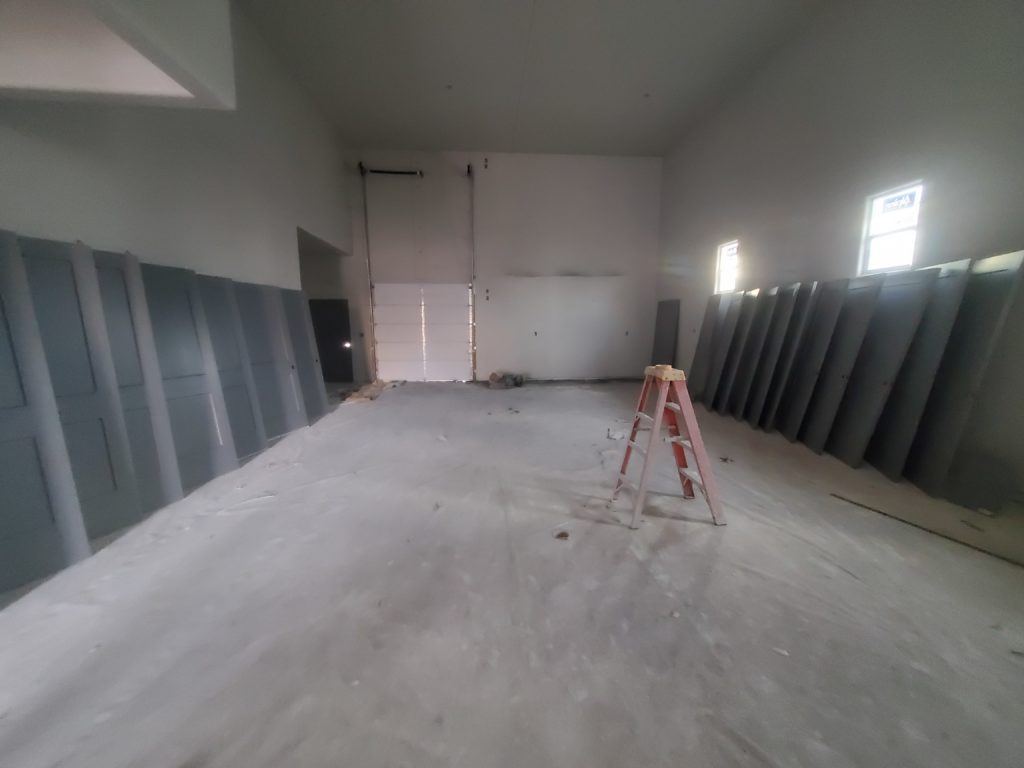
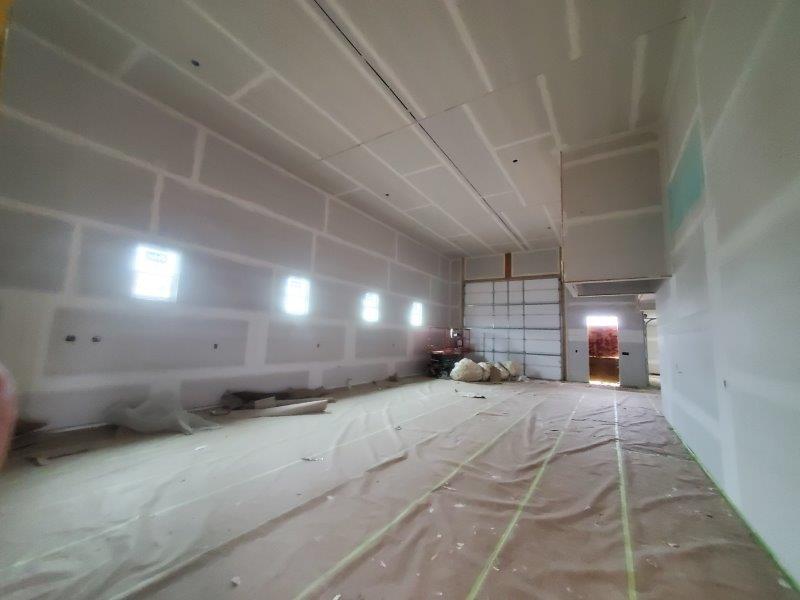
There are other small issues, but these two were the biggies for the living area. To get the living area ready for us to move in the builder put the second floor shop area on the back burner. So that is another big task we have no idea when it will be completed. Our punch list was over 60 items. I think we are down to 40 items. It shouldn’t have to be this hard.

So close to done

We are a day or two away from the living space of the house being done. Progress feels agonizingly slow. But you talk to others building houses here and we are all in the same boat. Demand for skilled workers exceeds the supply.

The painting crew has been spending a lot of time here. It seems they send in the second string initially to do the painting. Three nights ago we were dismayed at the painting job being done. Then the first string came in the next day to touch up…so much better!

Right now the main living area, my sewing room and the guest bedroom are all done.

The finished great room. The fireplace facade still needs gray stacked stone.
Kitchen and dining area to the left. I am still using the loaner induction cooktop. Mine will be here at the end of the month.


The master suite, laundry room, powder room, the husband’s shop and the garages are all in need of paint attention.

The master bathroom is complete except for the aforementioned painting touch-ups.

The builder got me a granite countertop for the pantry. Lots of storage here.

Outside…there is still a lot to do, especially since they have been concentrating on the completion of the inside. We do have the concrete pads at the front and back of the garage. And there is now a concrete approach at the driveway.

A few days ago, the painting crew put the gray paint on the architectural “eyebrows” on the house. The two front pillars will get gray stacked stone.

Then it rained, unexpected in May!

We had a beautiful sunset just as the thunderstorm was moving in.

And after the rain….

After the storm, we knew exactly where some work need to be done to keep water out. This is at the rear of the RV garage.

Moving In

Yesterday we started moving in where we could. We purchased some stools to sit at the kitchen counter. I found some of our dishes. Etc, etc, etc. This is going to be a slow process, we aren’t as young as we used to be!

We purchased some counter height stools for the kitchen island.

I made it a point to find the recliners and TV in the pile of stuff in the garage. I’ve missed my recliner! I also dug out the living room rug. I ordered an 8′ x 10′ pad to go under the 8′ x 10′ rug. What did Home Depot ship me? A 12′ x 15′ pad. Grrrrr. Now I have to find scissors to cut it down to size.

Attic Lift

And finally, the husband’s long awaited attic lift is installed! He accomplished that task yesterday morning. It is going to make getting supplies to his shop so much easier. This 40 second video shows it in action.

It’s time to wrap this post up. The painters should be here again soon to finish up inside. Fingers crossed they finish today!

It’s Electric!

Before we start, let me urge you to make sure you scroll all the way to the end to see what James’s latest toy is! Now onward….

It’s been two weeks since we moved our worldly possessions to the Southwest and stacked it all in the RV garage. And that is where our stuff still is…in the RV garage. There has been some progress on the house, but it feels like two steps forward and one step back.

The backsplash in the kitchen got installed. It looks great!
The granite company came out and cut the hole for the induction cook top.

Yeah…about that induction cook top. The appliance company was loading the truck with our goods the night before it was to be delivered. Someone DROPPED our induction cook top that we had ordered last October. The glass shattered. No more cook top.

The appliance store sent over a loaner cook top. But look…it doesn’t fit! The cabinetry below needs to be trimmed some. I’m told that the cabinet would have had to be trimmed no matter what cook top was installed. I’m betting the replacement cook top arrives before we are moved in. Why bother with the loaner? Because we want to pass inspection if we do get moved in before May 19th (the date for the new cook top to arrive).

Then it was garage door opener day. Woohoo! I had bought the network router for the new house already (of course I had!) and scrambled to get it set up. By the time the installer was done installing three garage door openers, I had the WiFi portion of the house network up and running and we were able to pair the garage door openers with the apps on our phones. They don’t call me Geeky for nothing!

Of course, the installer had to bring his own lift to reach where the openers go for the RV garage doors. And he has to work around our stuff draped with plastic.

Let’s not forget HVAC day! Our whole house heat pump and master bedroom mini-split (to make the bedroom cooler than the rest of the house) needed to get up to the roof. Stand back and watch.

A crane showed up and within minutes the items were on the roof. Unfortunately, it was discovered the wires for power for the mini-split didn’t get run up to the roof. Grrrr. More on that later.

Another day was tap-into-the-gas-line day.

This is the crew that digs a hole and taps into the gas line at the street. Another crew puts in the meter (at the street!!!) and connects it to the gas line going to the house. But where’s the gas line going to the house? Turns out no one had reached out to the plumber to put the gas line in. Grrrr. Two steps forward, one step back…again.

Last Friday was a big day. The rest of the appliances, the front door, AND the electricians arrived! Yup, “It’s Electric.”

The front door with the large panes of glass and the side lights really open the room up and allow you to see the Organ Mountains. I love it!
I happened to be in the house early one morning and the sunlight was just streaming in!

By the end of the day, I had a washer installed with power (dryer is installed, but no power to it yet) and I had power in my sewing room.

So, come Saturday, I ran my first load of wash, our RV rugs were filthy. I don’t have hot water yet (still no gas to the water heater) or a water softener (supply chain issues). But I can do a cold water wash…and I did!

What a beautiful sight! A washing machine in action. No more laundromats for me!
This washing machine is almost identical to the one we bought six years ago. But now the appliances talk to your home network. Here’s one more app on my phone…47 minutes until my rugs are clean.

Being it was the weekend and we sincerely doubted anybody would be working on the house (which turned out to be true), I decided to set up, temporarily, in my sewing room. Oh my! It felt almost normal to be able to spread out while quilting.

I grabbed the folding table from the RV and found my ironing board and sewing chair in our “stuff”. I was all set. Sewing with a view! What a wonderful Saturday and Sunday. Unfortunately, I had to take it all down Sunday night.

Today the electricians showed back up. At the end of the day today, we have some lights that work!

We finally got to turn on the light over the kitchen island for the first time. Still loving it!
Our outside lights have been installed. We picked ones that shine down only. There is enough light pollution sullying our nighttime skies, we didn’t want to add to it.

But there was a lot of this going on too. Have I mentioned two steps forward, one step back?

There seems to be an interference here. Light fixture needs to be moved.
And now we have a hole in our master bathroom wall. I think this is part of the effort to get a wire up to the roof to power the mini-split.
How about these new holes in the corner ceiling of the laundry room. Again, it’s related to that wire needed at the roof. The poor drywallers have to come back AGAIN!

But all in all, it’s starting to look like there is a light at the end of the tunnel….at least as it pertains to getting us out of the RV and into the house. The list of post-move-in-things to be done is still long. The shop lift, shop flooring, driveway, landscaping, outside painting. Don’t ask what the target date is, we have blown by it already.

The house is looking good with the scaffolding removed. The garage doors, front door, and eyebrow soffits still need to be painted gray. Also the pillars are going to get black stacked stone.
Lots of landscaping needed. That may wait until the fall. You can see the RV’s nose sticking out on the left hand side. Parked there, we now have full hookups! Electric, water and sewer. That’s something.

Let’s talk weather toys…

James here. Since we have the house network up and running, I got to bring my new weather station online. I chose to get the WeatherFlow Tempest station (https://weatherflow.com/tempest-home-weather-system/). They have a large network of installed stations and the design has no moving parts and is wireless and solar powered.

I installed the unit on a post in our backyard. Unfortunately the southwest is known for having lots of caliche (https://en.wikipedia.org/wiki/Caliche). It is a type of soil/rock that is like a poor grade of concrete. To dig the post hole I had to use my hammer drill and a masonry bit to break up the caliche, then take a shovel to break up the big chunks, then using a soup can duct taped to a long stick I scooped the soil out of the hole. Long slow process.

The end result is the station is on the pole and running.

The pole at the back of our yard with the weather station on top.

Besides providing the data to me it also reports it to WeatherFlow. Each user can elect to make the information public or private over the internet. I have elected to make it public, so anytime you want to know the weather in our back yard you can use this link to get right to my station (https://tempestwx.com/station/100246/). Or you can bring up a map showing all the stations in the world, zoom in to Las Cruces, and select the station named “East of A Mountain”.

When you bring up my station using the above link you will see this display.

If you click on the top block that displays the temperature etc. you will see this list.

If you click on any element in the list it will bring up a graph of that element, for instance temperature.

So check out our weather and enjoy. The display is the default that comes with the station. We will be checking into other (hopefully more informational) displays. So stay tuned, we may have an update in the future.

Our “stuff” has arrived!

Since our last blog post, it’s been an exhausting whirlwind of activity. A week ago, we flew back to the Northeast to gather up all our belongings and get them to the Southwest.

We had 80% of our “stuff” already packed up. But it took two days to finish the last 20%. We hired a crew of movers to get the stuff out of the basement of our former residence and into the truck. Our legs/knees just can’t do it anymore.

Huge thanks to Dave/Marsha and Mary Ellen for pitching in and helping. They will always have an open invitation to visit us inour new city.

We drove back to our new hometown in three days. That is 2000 miles in three days. Yes, we are exhausted.

On this end, we reversed the process. We hired movers to unload the truck and put the stuff in the RV garage. The house still isn’t ready for us, but it’s getting close.

Let the off loading begin!
This pile seems so much bigger up close! We are amazed it all fit in a 26′ truck.

While we were unloading, the stucco crew was on site. In fact, they were able to get the final stucco coat on the front of the RV early this morning so the scaffolding could come down. That made it so much easier to back the moving truck up to the garage opening.

It’s no easy feat to stucco a tall RV garage!
The back of the house has it’s final coat of stucco on it.

There are some definite changes inside the house. We have counter tops, plumbing (including working toilets!), and light fixtures.

I absolutely LOVE the granite counter tops! And check out the linear pendant light over the island. Love it!!!

Here’s the pendant light from another angle.

Our entry way has a contemporary chandelier. But we still don’t have the correct front door.
We have the ceiling fan in the living room now. The cedar beams will be stained this week.
We have lights in the master bathroom.
And finally, the laundry sink has been installed.

The painters/tilers will be here on Monday to finish up their punch list. I’m hoping the stucco installers will be done in a few days. We have a broken window that needs to be replaced. But we are getting close.

The one thing that may hold us up is the connection to the natural gas at the street. The gas company has been called, but someone is dragging their feet. So for now, the RV is still home.

Flying along….

Want to see what our neighborhood and surrounding area look like? Seriously! Our friends who were here last week have a drone. Dan willingly got it out to shoot a video of our neighborhood and house. Check it out. The video is 2.5 minutes long. Thanks Dan!

Things are flying along in other respects too.

The floors are in and so are the cabinets.
Shelves are installed in the pantry. The opening below the counter is for a beverage fridge.

The master bath cabinets are in.
The tile work is done in the guest bathroom. The proportions of this picture are a tad off. The bathtub is a standard size tub.

The master bath snail shower is done. A snail shower means you don’t need a door or shower curtain since the shower curls into itself.

We have a seat opposite the shower head.

There are three nichos in the wall to hold shampoo, etc.

We are now in the midst of picking out backsplash tile and towel bars.

Here we are auditioning backsplash tile to go with our granite. I think the granite on the left wins. But no promises. We are taking yet another trip to the store this afternoon.

One of the builder’s assistants just showed up at the house. I think we just got a tankless water heater and a light fixture delivered!

Cabinet install!

Things are really moving. We constantly have multiple vehicles parked in our front yard. The trades are working in parallel in order to keep things moving. For example, the tile guys did the tile floor grout in the kitchen first so the cabinet installer could come in and work.

Let’s start with a video I shot last Sunday.

Since then the tile floor is almost all in. They installers are down to the fussy parts now, all the little cuts they have to make. And it turns out the installers were short of tile, about 12 boxes short. So yesterday the hubby and I offered to drive down to El Paso and pick it up. That was our good deed for the day! It keeps the progress going.

The gray coat of stucco was finished up yesterday morning. Yay!!!! We aren’t sure when the elastomeric spray goes on. When it does, the RV is outta here! No over-spray for us.

Finally, the gray coat (the first coat!) of stucco has been totally troweled on.

This morning the cabinet installer showed up.

The cabinets are being moved the the rooms that they go into. The far wall in the kitchen gets the white cabinets. The gray cabinets make up the island. We opted for all drawers on the bottom. I’m getting too old to climb in black hole type spaces below the counter top.

The tile is also going in the shower and around the tub. I don’t have a picture of that yet, I don’t want to get in the installer’s way. But this is what the tile looks like.

The tile will be installed vertically and the shower floor will be hexagon tiles to match.

I’ll leave you with a picture of this morning’s sunrise. The day started out beautifully…let’s hope things continue that way!

Paint, Stucco and Floor Tile

Things have been happening this week. The painters came in and primed and painted all the walls.

All painted. Now we have to decide what surface to put on the fireplace surround.

All the doors were hauled out to the RV garage and painted.

That is a lot of doors!!!!

And the door frames were painted inside the house.

I see some over spray onto the walls. They must touch up the wall paint later.

After painting, the floor tile started going in. Woohoo!

The guest bathroom on the left and on the right, my sewing space.
The tile continues into the great room and kitchen. You have to start somewhere!
A close-up shot!

Things are happening outside the house too. The stucco gray coat is going on! After the gray coat, we get a sprayed on elastomeric coating (the RV will get moved for that…don’t need it coated too!). Then there will be a final troweled on coating of stucco.

In the morning sun, you can tell where the gray coat of stucco is applied and where it isn’t. When the stucco is wet, it almost looks like the tar paper! It dries much lighter. The Jeep is parked where it is to keep construction thieves from stealing the cement mixed (behind the Jeep). Typically the stucco crew takes their mixer home with them every night, but with us on site they feel comfortable leaving it. Same goes for the painter’s trailer…it’s parked right next to the RV (hard to see in this shot).

We have been picking out paint colors and stone, one of my least favorite things to do in the world.

The red arrow points to the color of the house stucco. The stacked stone is what will go onto the architectural posts on the house front and the chimney.
Now we are trying to decide what color to make the overhangs. Decisions, decisions!

The neighbors who let us park in their driveway had us over to sit on their rooftop deck at sunset last night. It had reached 80 degrees during the day, so the evening was fairly warm.

A deck with a view!

Drywall done, paint started.

Things have really been moving along on the house! The drywall crew finished putting on the textured surface and sanding on Friday. Yay!

I took this picture as the sun was setting Friday evening.

On Saturday the garage door installer showed up to finished the rails on the very tall RV garage door. Yay! We now have three working garage doors.

This morning, we went up onto the garage roof deck and had our cup of coffee as the sun came up. We are definitely going to love our perch up there.

The weather is finally improving to the point where we can sit outside in the early morning. We are going up to 75 degrees today! 7 days ago we were seeing snow flurries. Go figure.

I took a couple of minutes to shoot this video as the came down from the deck. You can see some of the interior progress.

We have a target finish date of mid April. We’ll see!

Doors! Tape! Tile Backing!

We took off for a couple of weeks, a lot has happened since then! It may not look like it from the outside, but it sure looks like it from the inside.

First, a heck of a lot of drywall was installed and then the seams taped. If I get ambitious, I am going to count the number of sheets of drywall in that RV garage. Then again, the cost of it all might scare me.

The RV garage, looking towards the 14′ high garage door.
Off to one side of the RV garage is the wall with the solar controller. To the left of the controller will go the rest of the solar system along with the batteries.
This is looking towards the kitchen. The stove hood is wrapped with drywall. You can see the start of the kitchen island.
The fireplace is drywalled and you can see the cedar beams on the ceiling. To the right of the fireplace is a cedar shelf for the TV.
The tile crew was in yesterday and put in the backer board in the guest bath with tub and the master bath shower. They call these indents in the tiles “nichos.” They are for shampoo, etc.

How about some doors! We had a minute of entertainment when the company delivering the doors backed up and put their rear tires into an unfilled trench. Oops. The guys got a skid steer from the job site next door to lift up the back of the truck and get them out of the trench. The trench is now filled in.

Our kitchen cabinets are shaker style. These doors mimic that style.

Let’s not forget the husband’s shop.

Here is the shop on the second floor. Hopefully it is big enough!
This is a view of the shop from the other end. You can see the opening where the attic lift will go to get stuff from the garage up to the shop.
The attic lift is on site now. Yay!

The stucco wrap is finished. They should start troweling on the stucco in the next couple of weeks.

The stucco crew had to put up scaffolding to reach the upper walls of the RV garage.
This is a closeup of the stucco wrap. It is basically tar paper and chicken wire.

We have been meeting our neighbors and have been relying on them to loan us tools we don’t have here yet. We are going to like this neighborhood!